This section is used to manage site configurations.
Access

Sites administration is accessible in the upper right corner of Designer when clicking your name then “Administration”. Sites is the second tab of the Administration Screen.
List
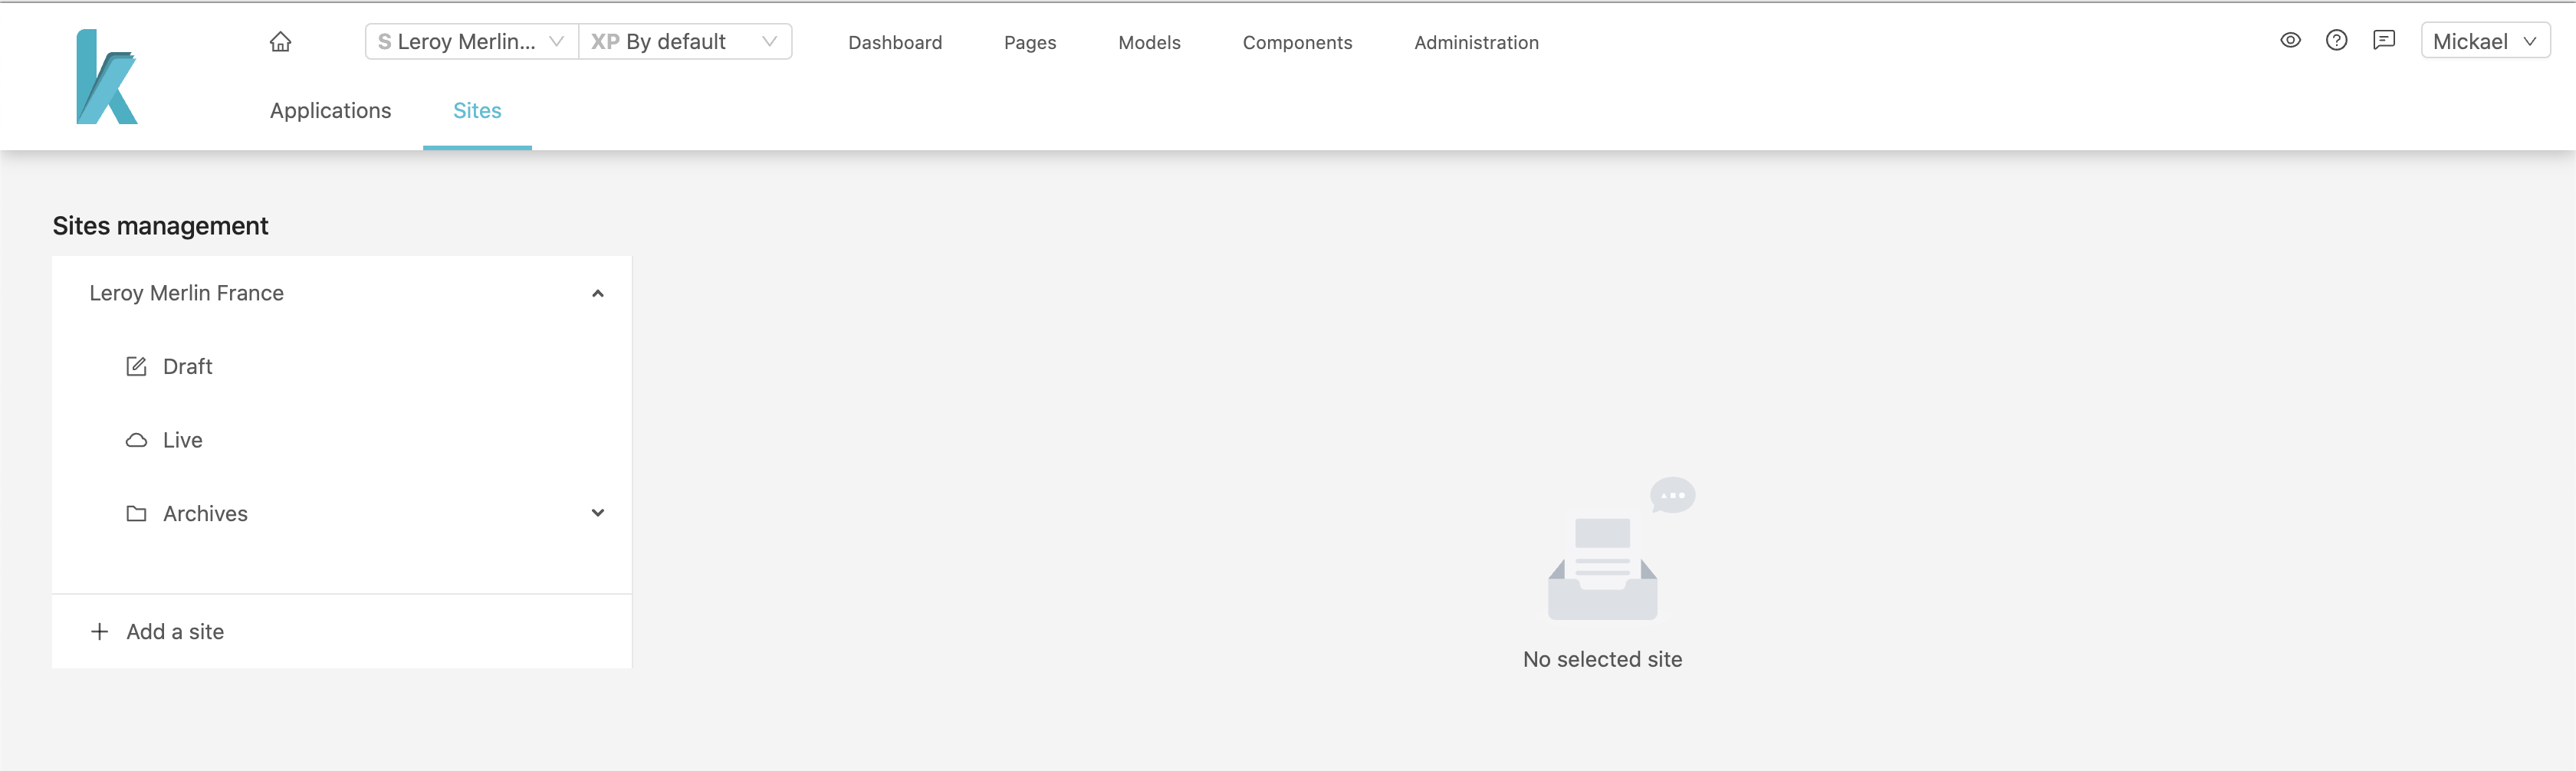
On this screen you will find the list of configured sites.
You can create new Site configurations.
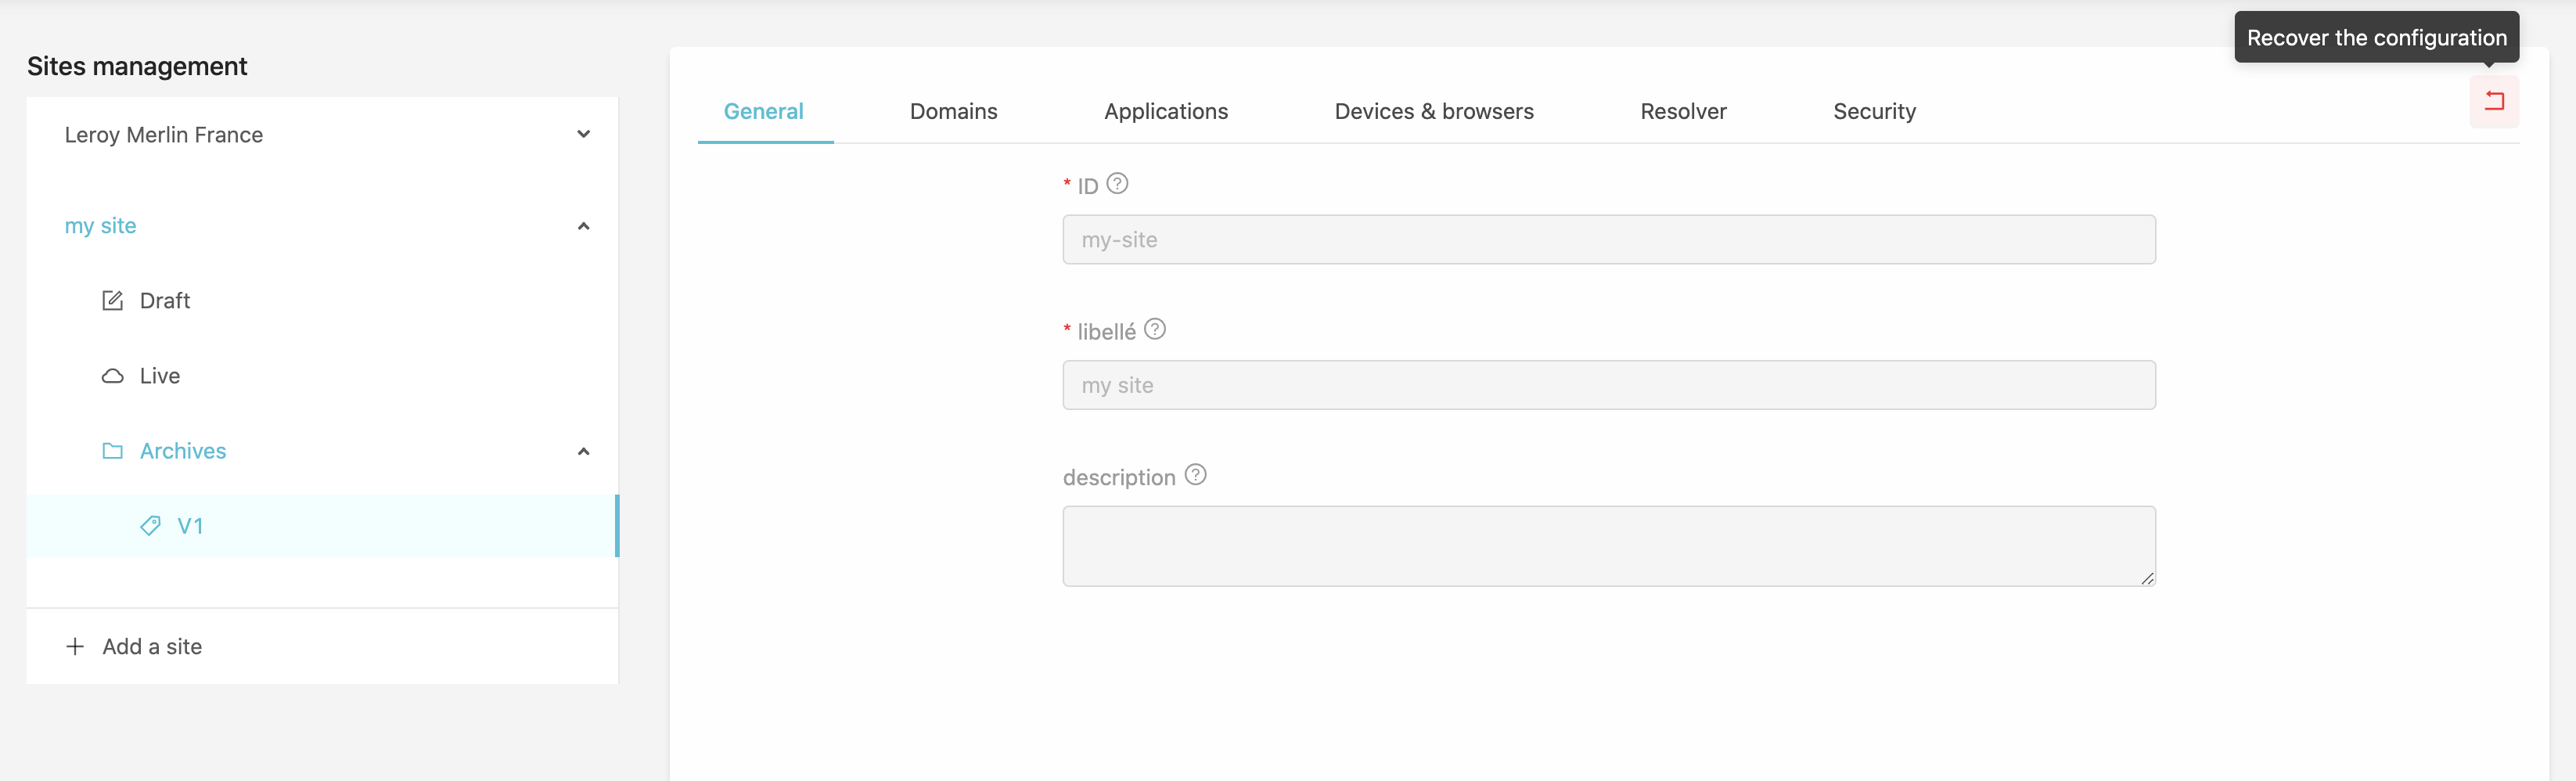
Configurations may exists in different states (Draft, Live, V1...N) that will be explained further.
Creating a Site
Click on + Add a site to create a new Site configuration, this will open the Site creation form.
General
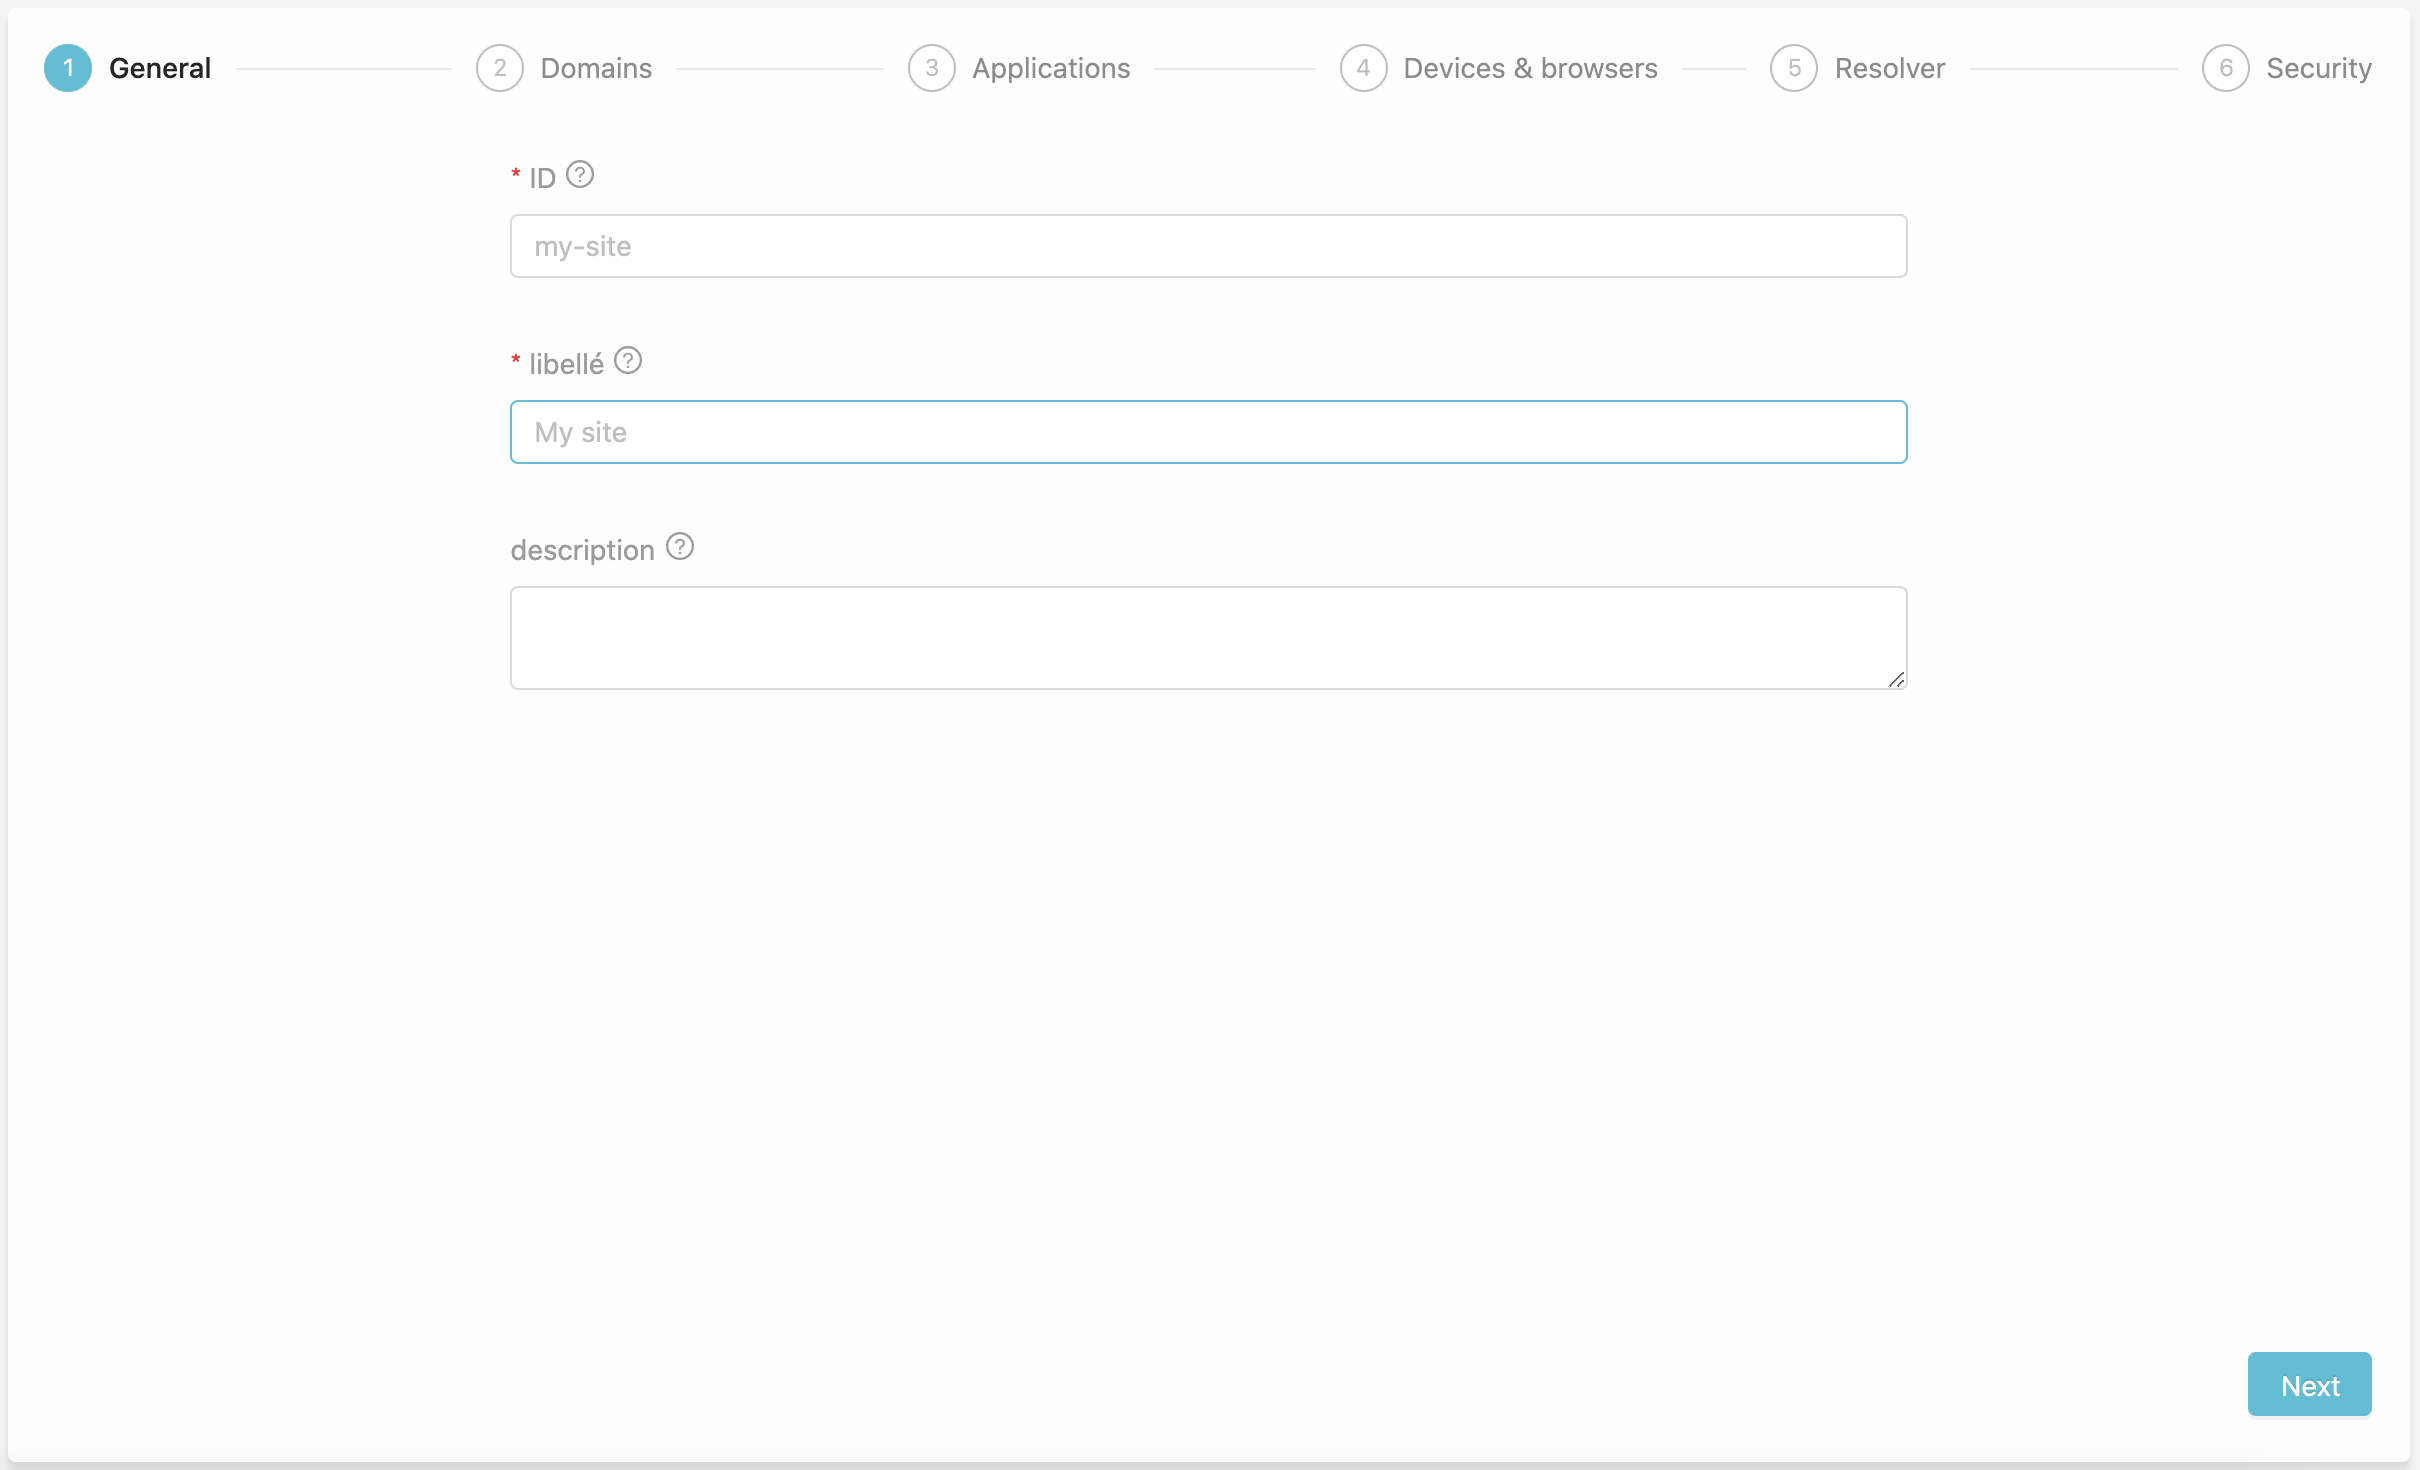
This first step requires :
- a unique site ID : this could be as simple as
my-site - a label :
My company sitefor example - a description : that is not mandatory
Domains
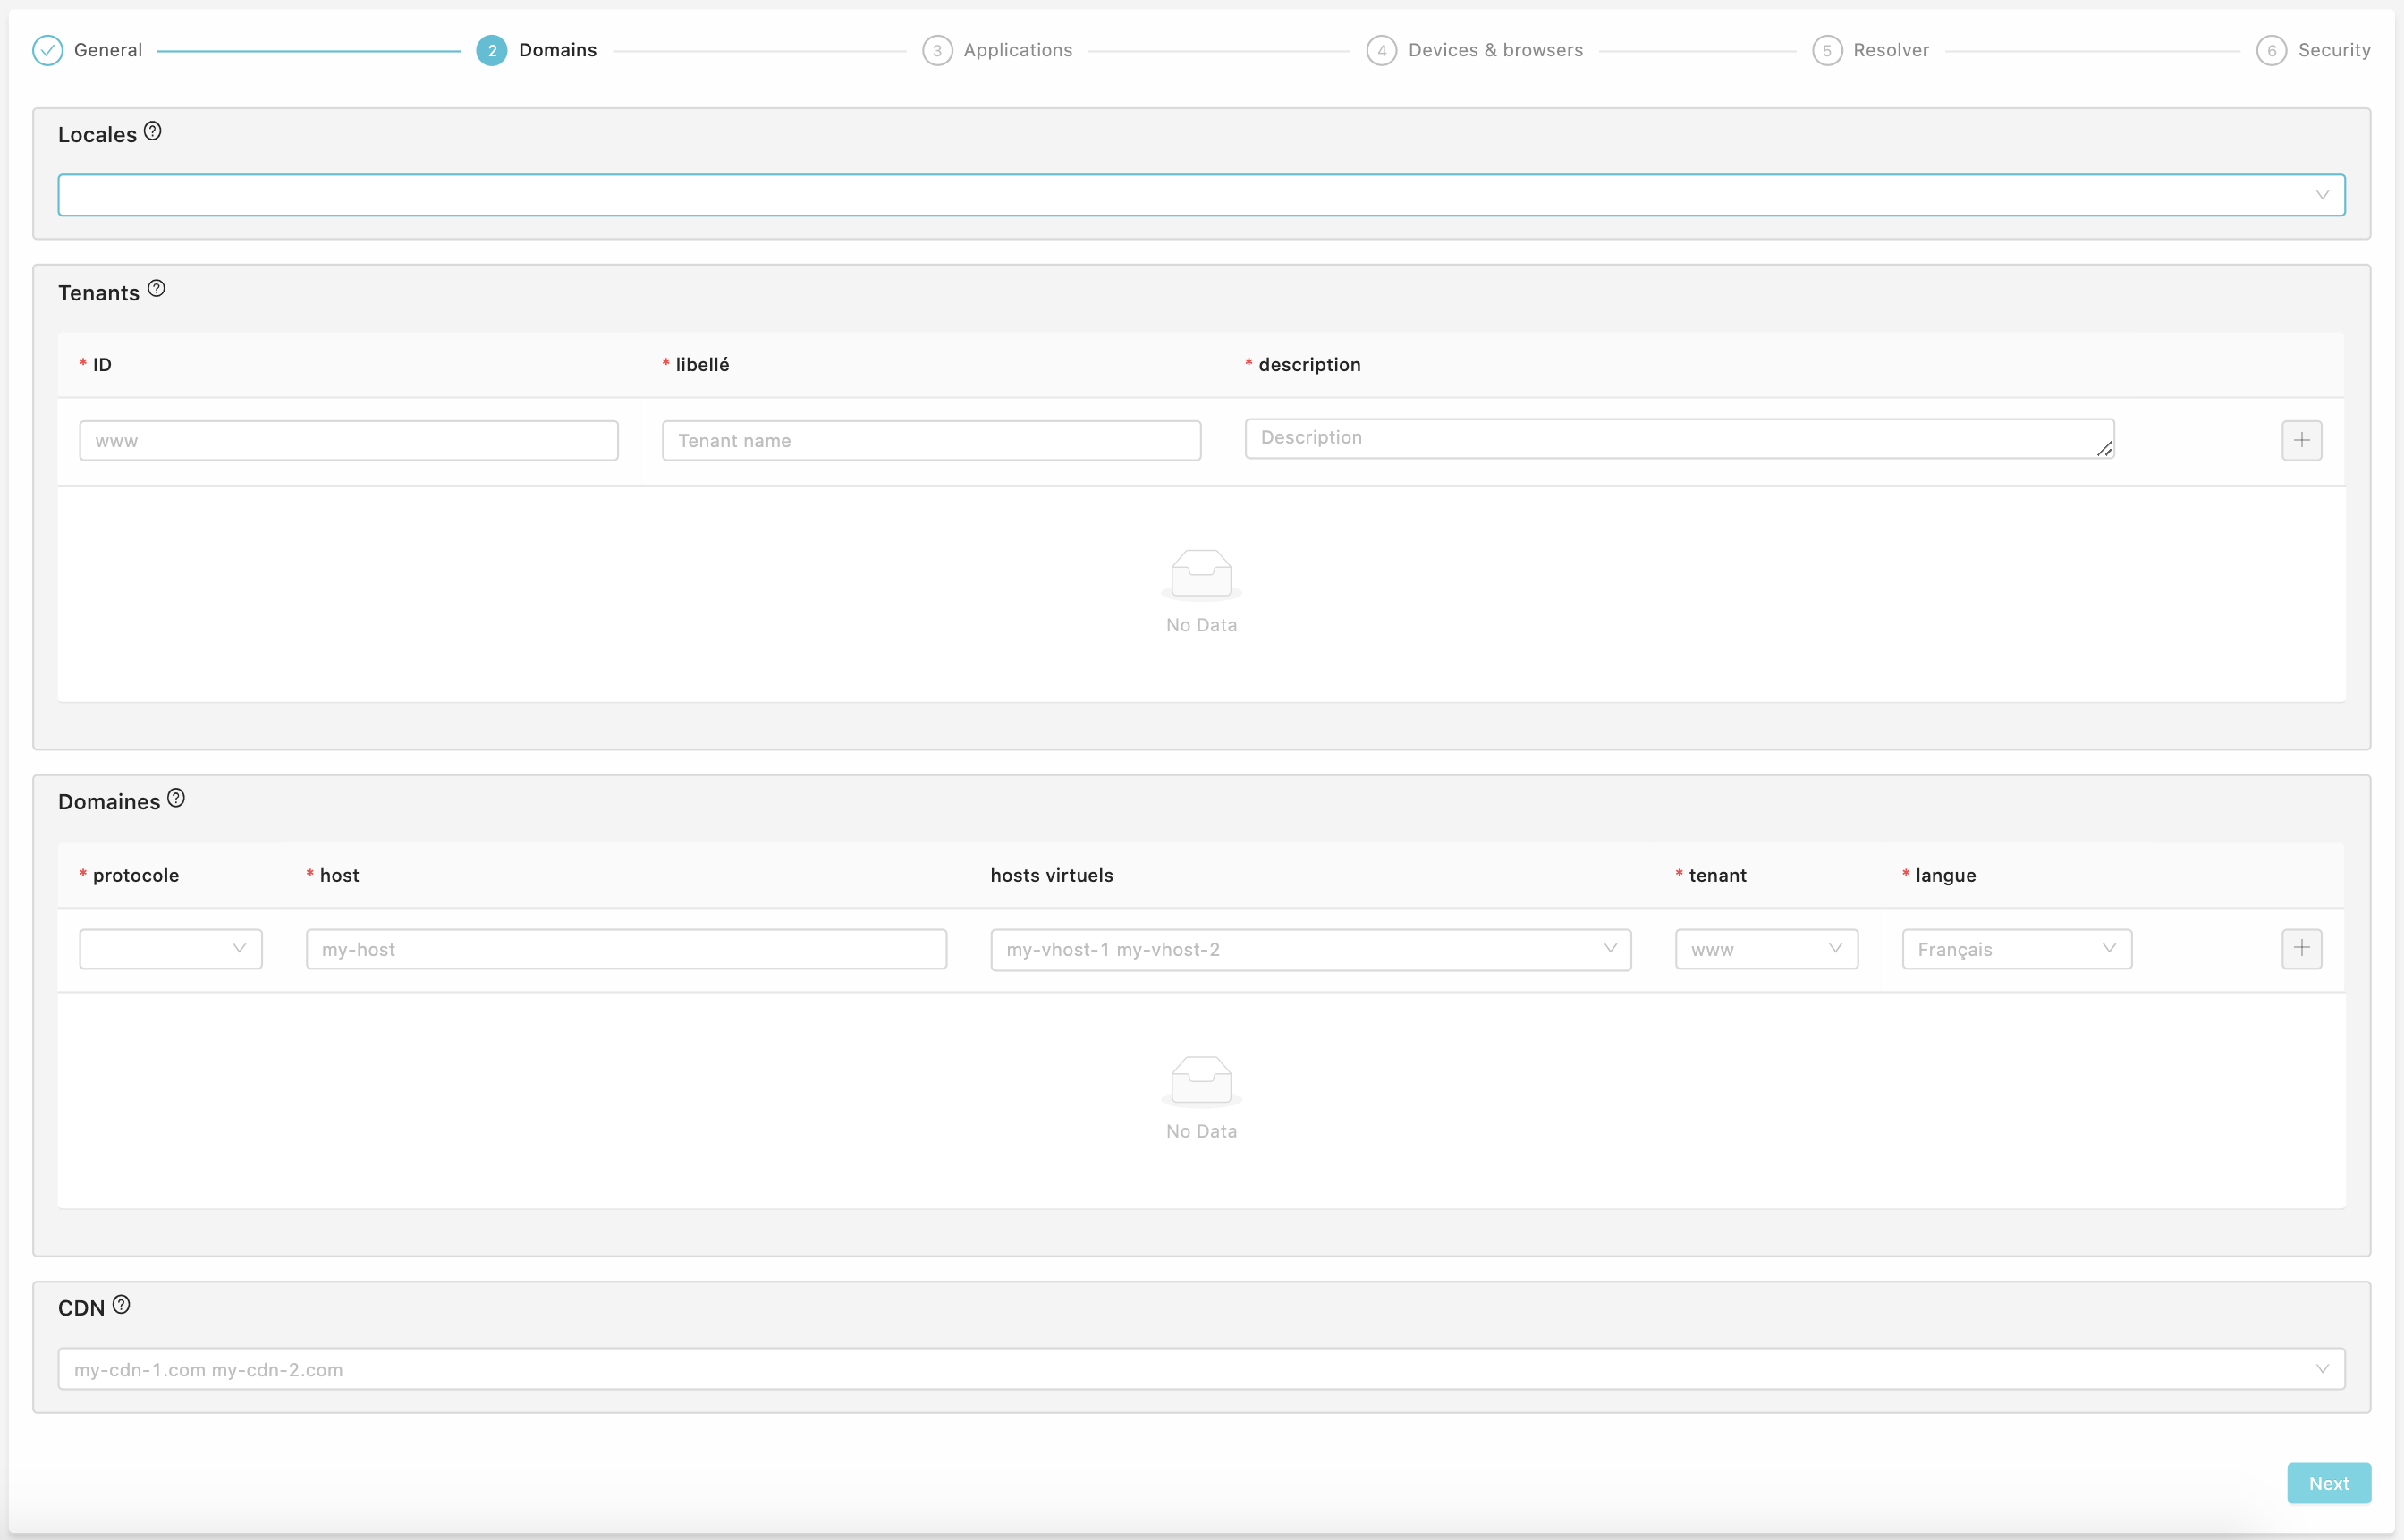
In this section you will configure the domains of your website. To do so you need to create at least one locale and one tenant.
example :
- locale :
fr-FR - tenant :
www|world wide web|www domain - domains :
https|www-my-domain.fr| \ |www|fr-FR
You can create as much domains as possible locale-tenant couple.
For example if I add a it-IT locale, i will be able to create the following domain : https | www-my-domain.it | \ | www | it-IT.
In the CDN section you can add your CDN hosts used to access static resources.
Applications
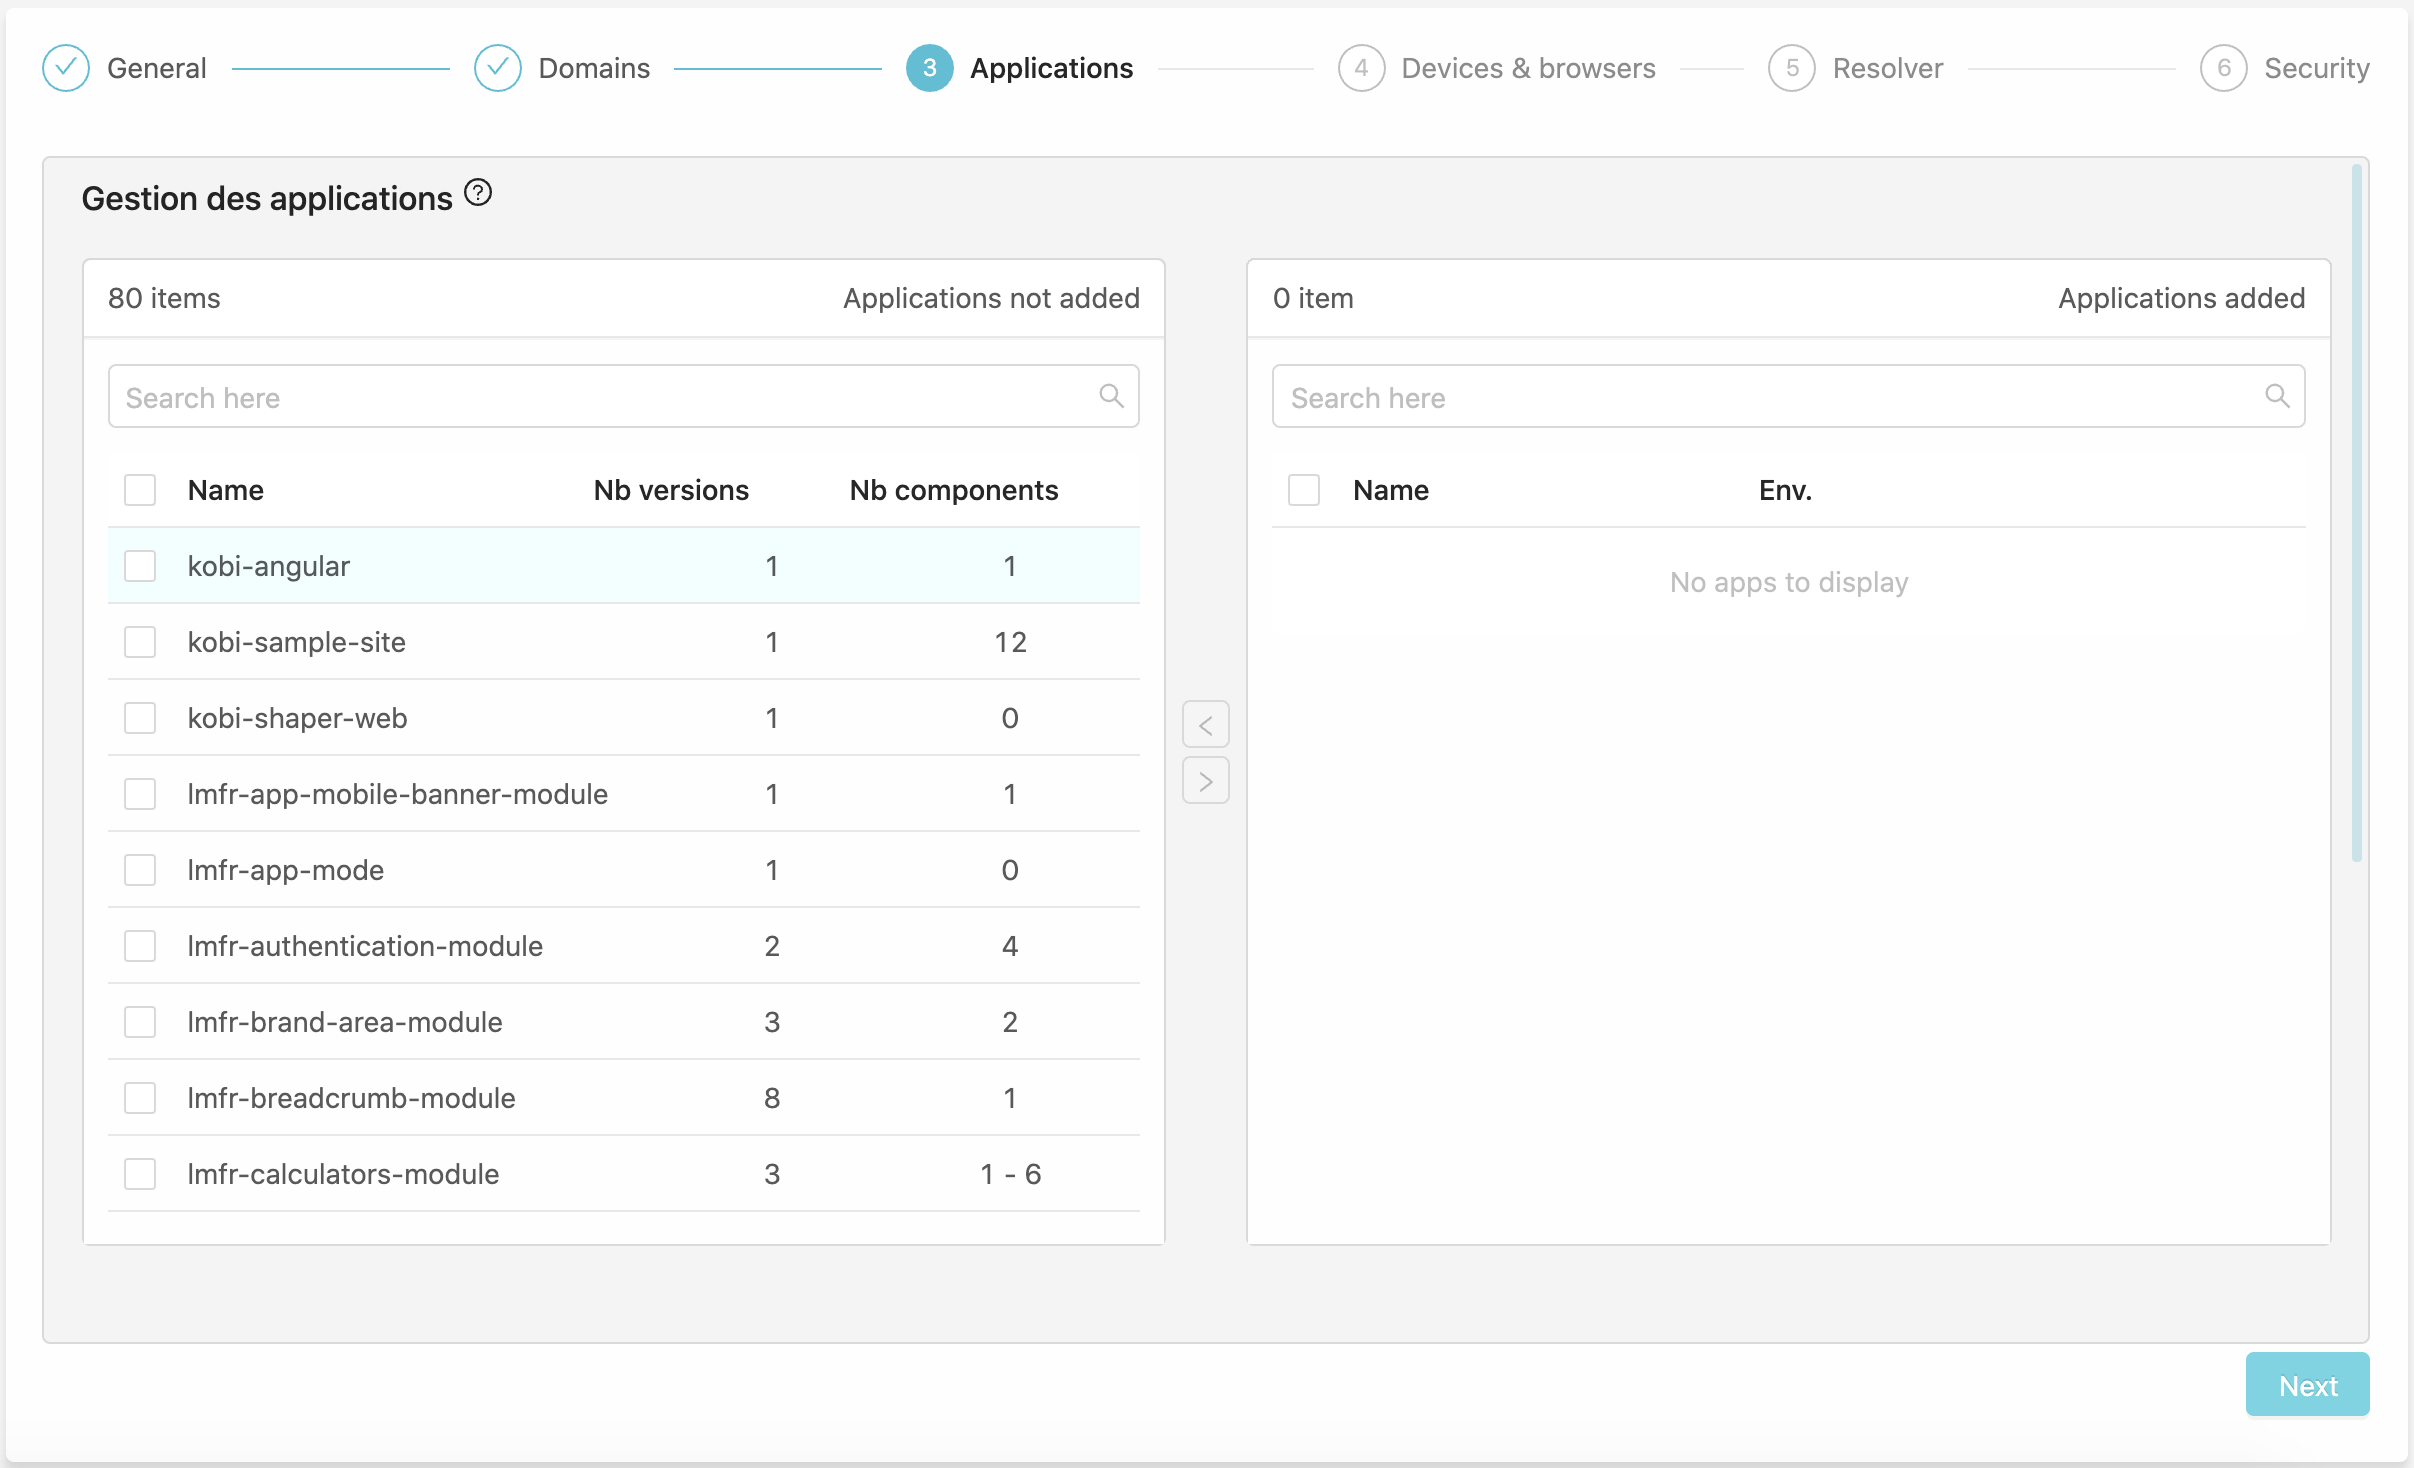
In this section you will a tab with 2 columns, in the left one these are all the applications registered in your Registry instance. To enable an application in your Site, you can select it (or multiple) and use the arrow to drag them to the right column.
For each application you will have to configure them :
- Choose the version (if multiple exists)
- Set a timeout
- Set a mounting point (this will allow to access static content or direct proxy on this path)
- Define cookie filters (will route only if cookies matches)
A Site configuration requires at least 2 applications :
- A site application (that hosts your templates)
- A Backend application : Shaper-web
If you set up more than one Site application, only the first one will be used for templates (but components will works).
Backend routing rules
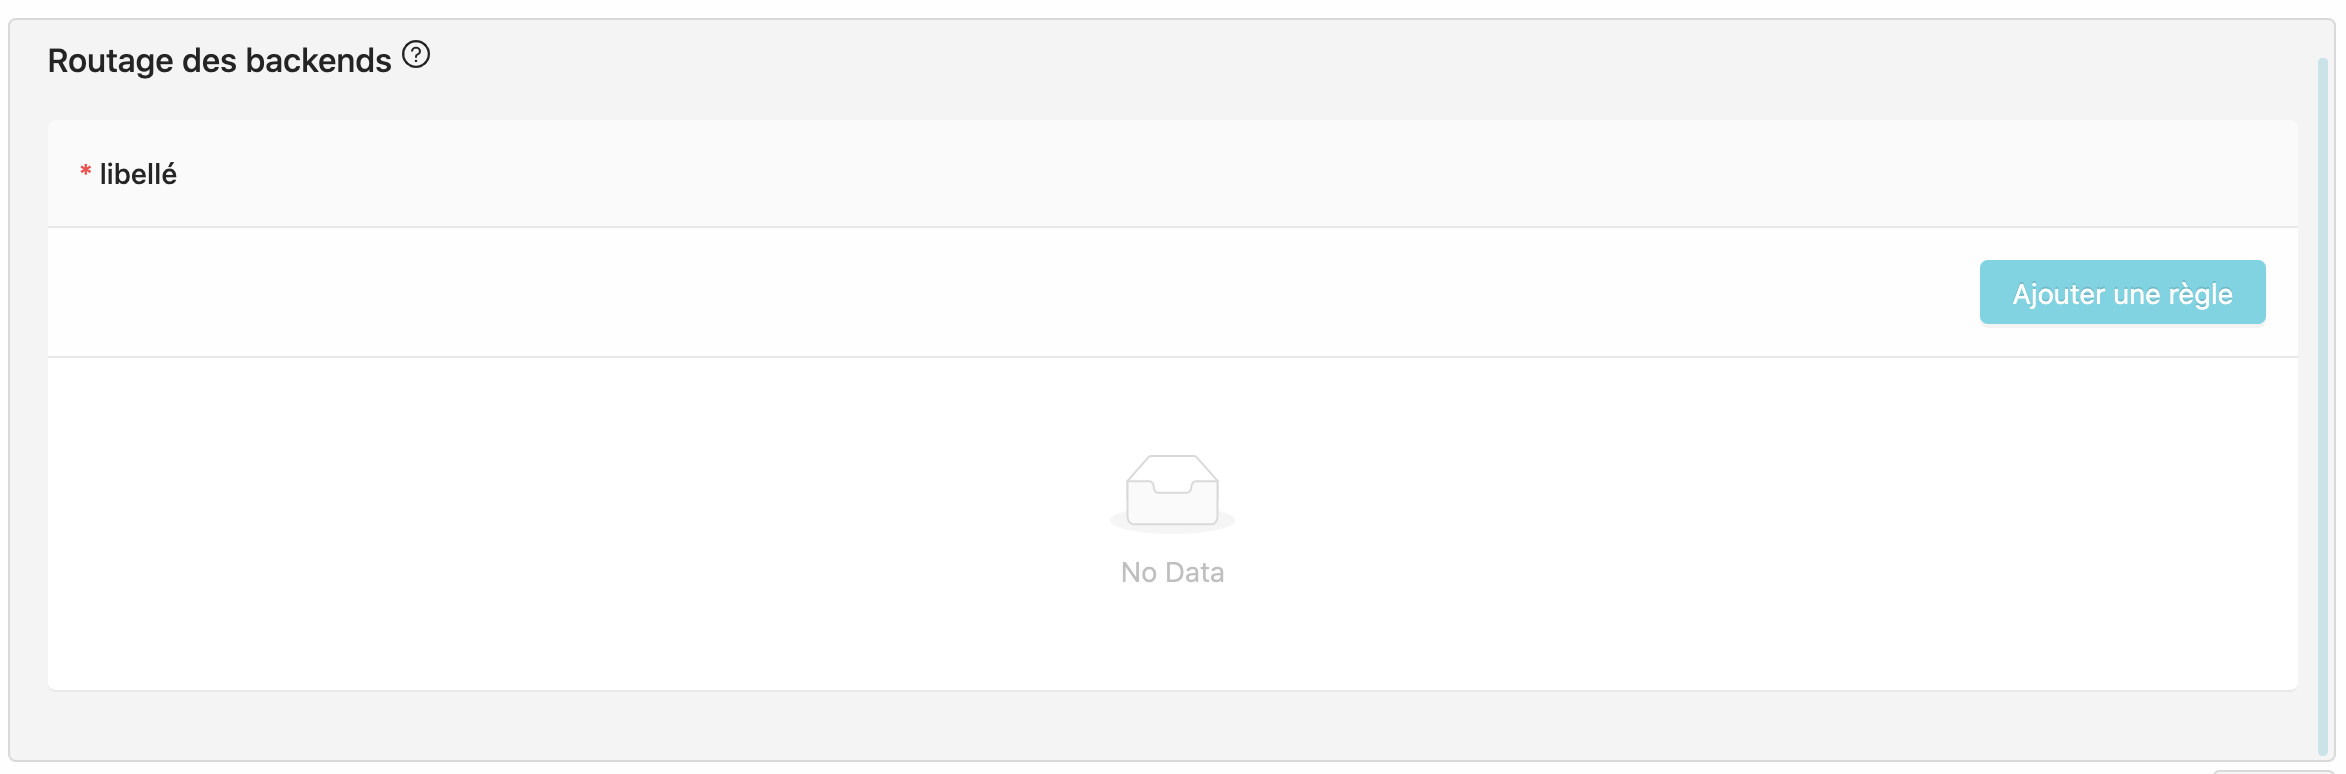
This subsection of applications allow you to define custom rules of routing between multiple backends, this is useful when you already have a Legacy site application and want to migrate to KOBI without bigbang. You should discuss this configuration with the KOBI team.
If nothing is defined here, the first registered backend in the application list will be used.
Devices and Browsers
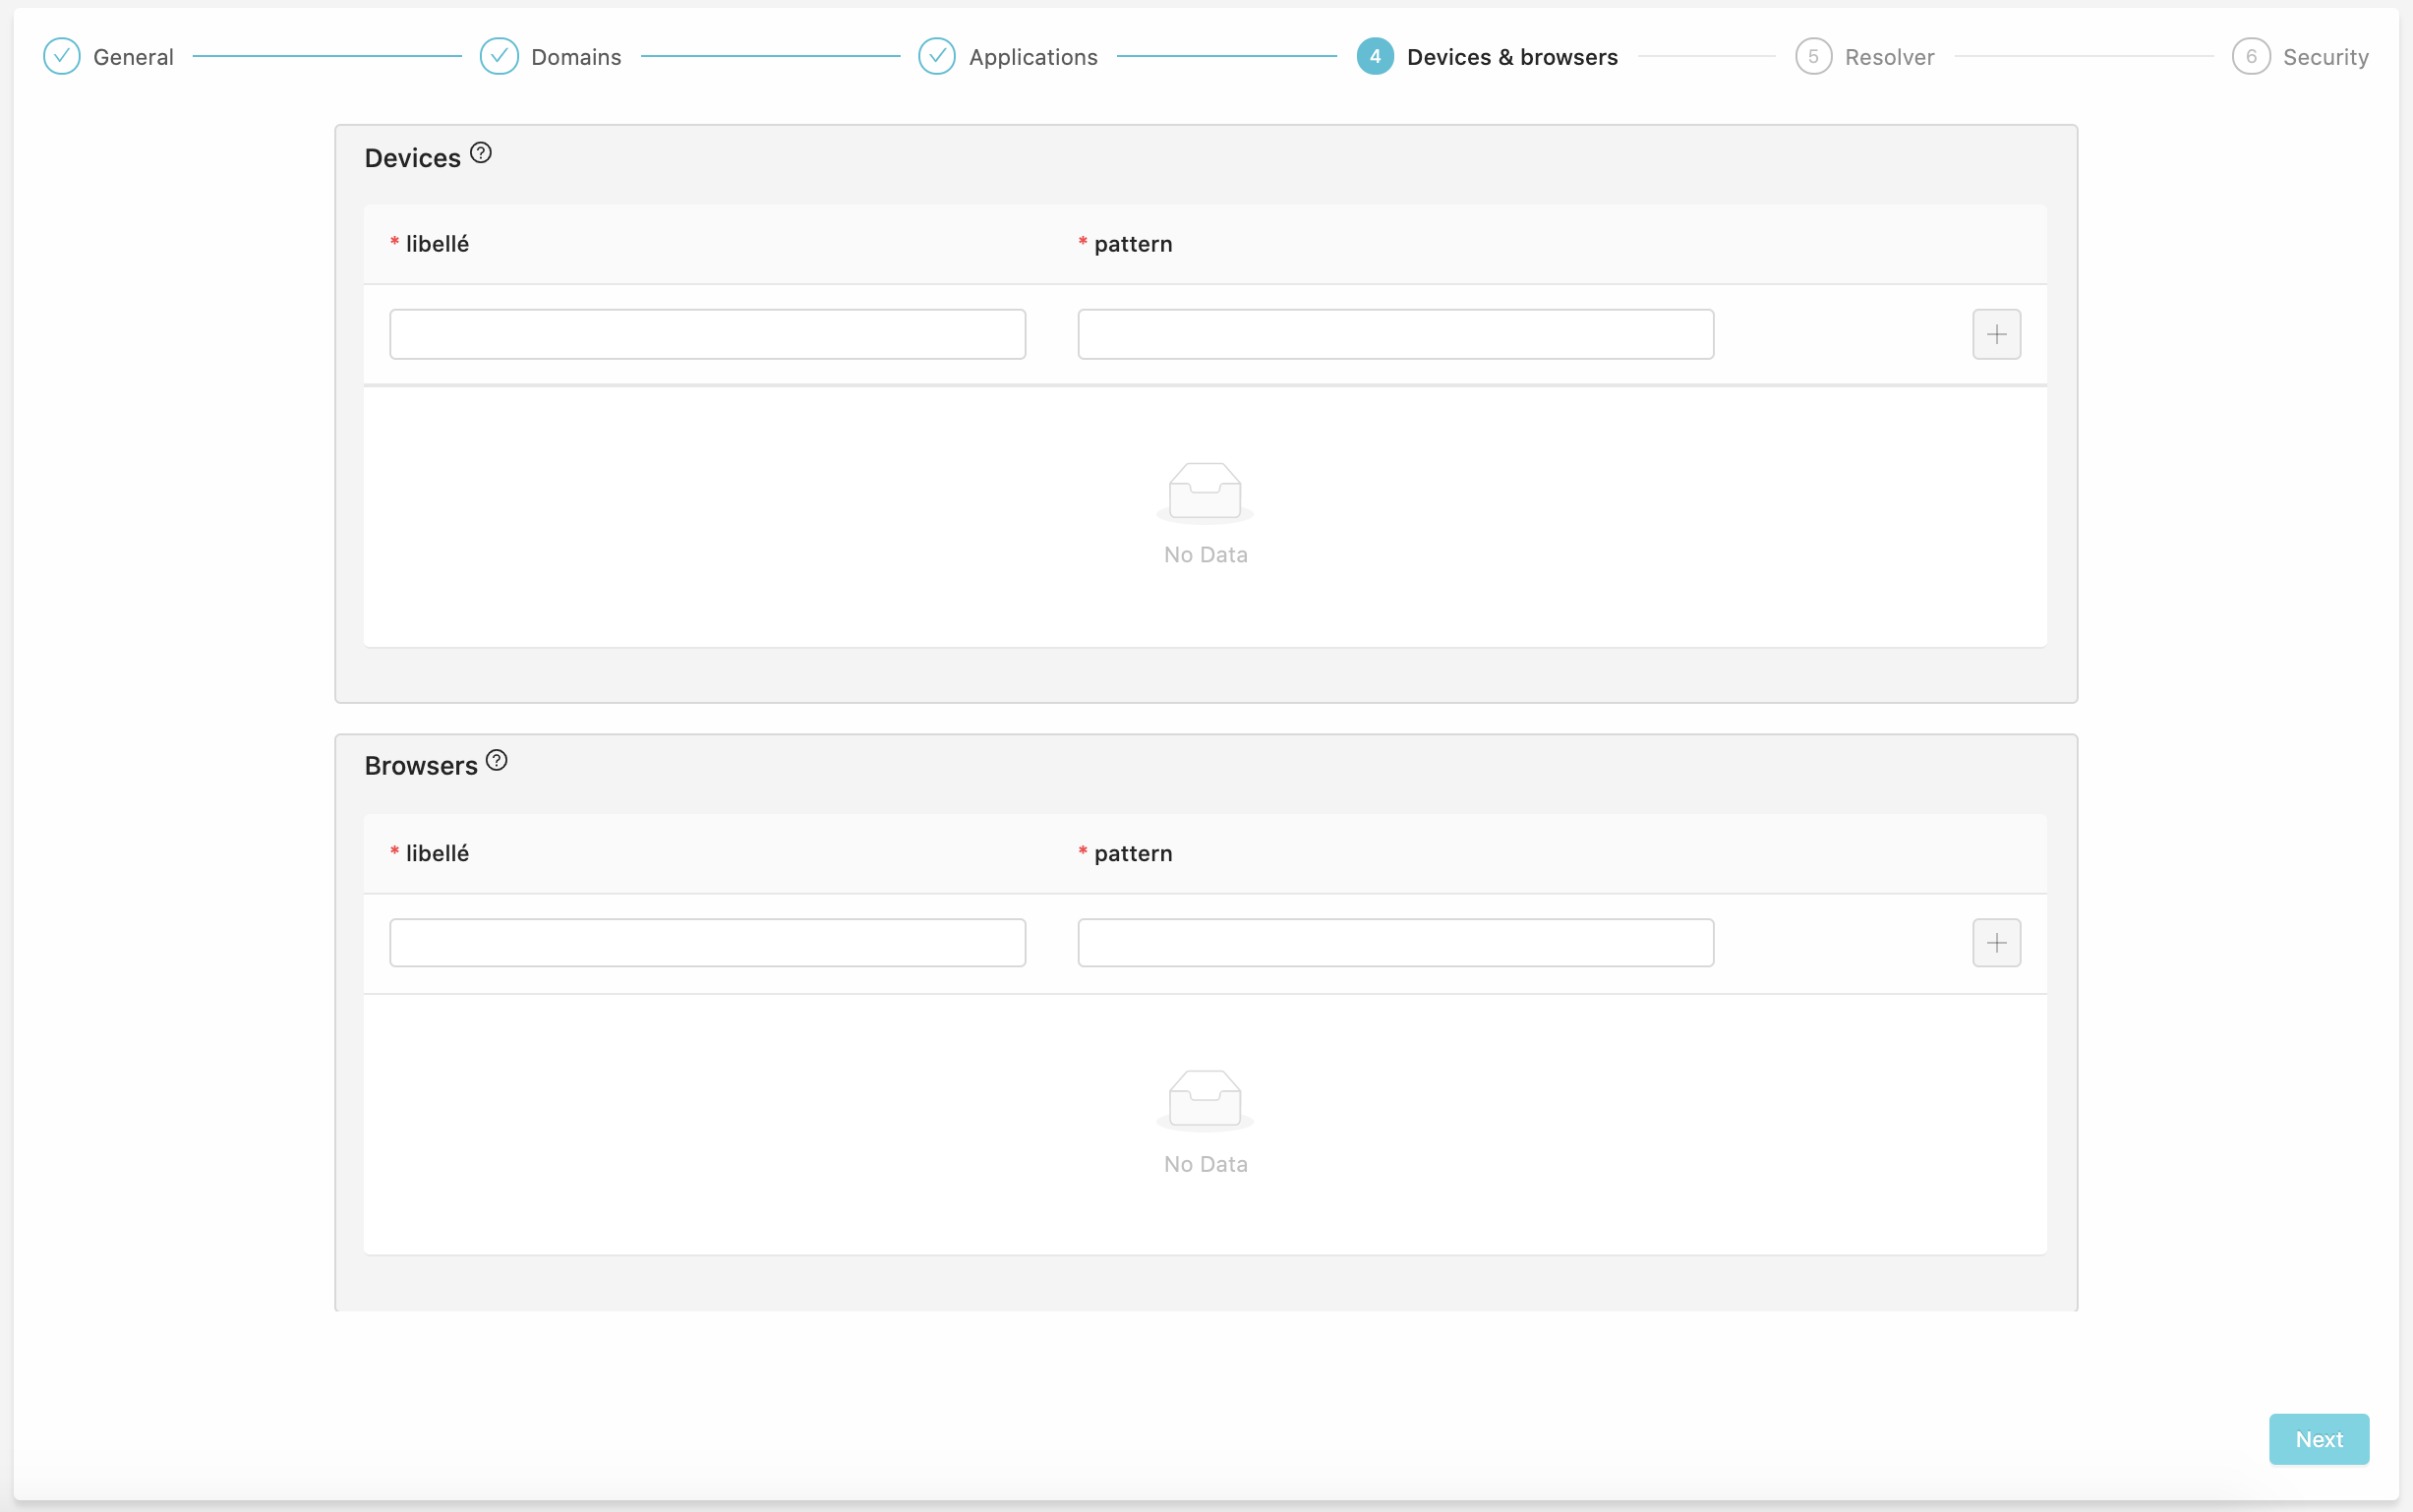
In this section you can define devices categories based on a user-agent pattern.
devices example :
- mobile :
(?!.*(iPad|Tablet|GT-[PN][0-9]+).*)(.*(MIDP|NetFront|Blazer|Elaine|WAP|IEMobile|UP\.Browser|Mobile.*Safari|AppleWebKit.*Mobile|Windows\ Phone|Opera\ Mobi|Opera\ Mini|Mobile.*Firefox).*) - desktop :
.*
Gluer resolve devices & browsers in order, so if the user-agent does not match the mobile pattern, the next one (desktop) will be set. This information allow dynamic serving
This is the same mecanism for browsers (ordered user-agent pattern matching).
browsers example :
- modern :
.*(Version\/(1[2-9]|[2-9][0-9]).*Safari|Chrome\/([7-9][0-9]|[0-9]{3,})|Firefox\/(67|68|69|[7-9][0-9]|[0-9]{3,})).* - legacy :
.*
The browser may be useful to deliver lighter resources for modern browsers, and compatibilities fixes for older ones.
Resolver
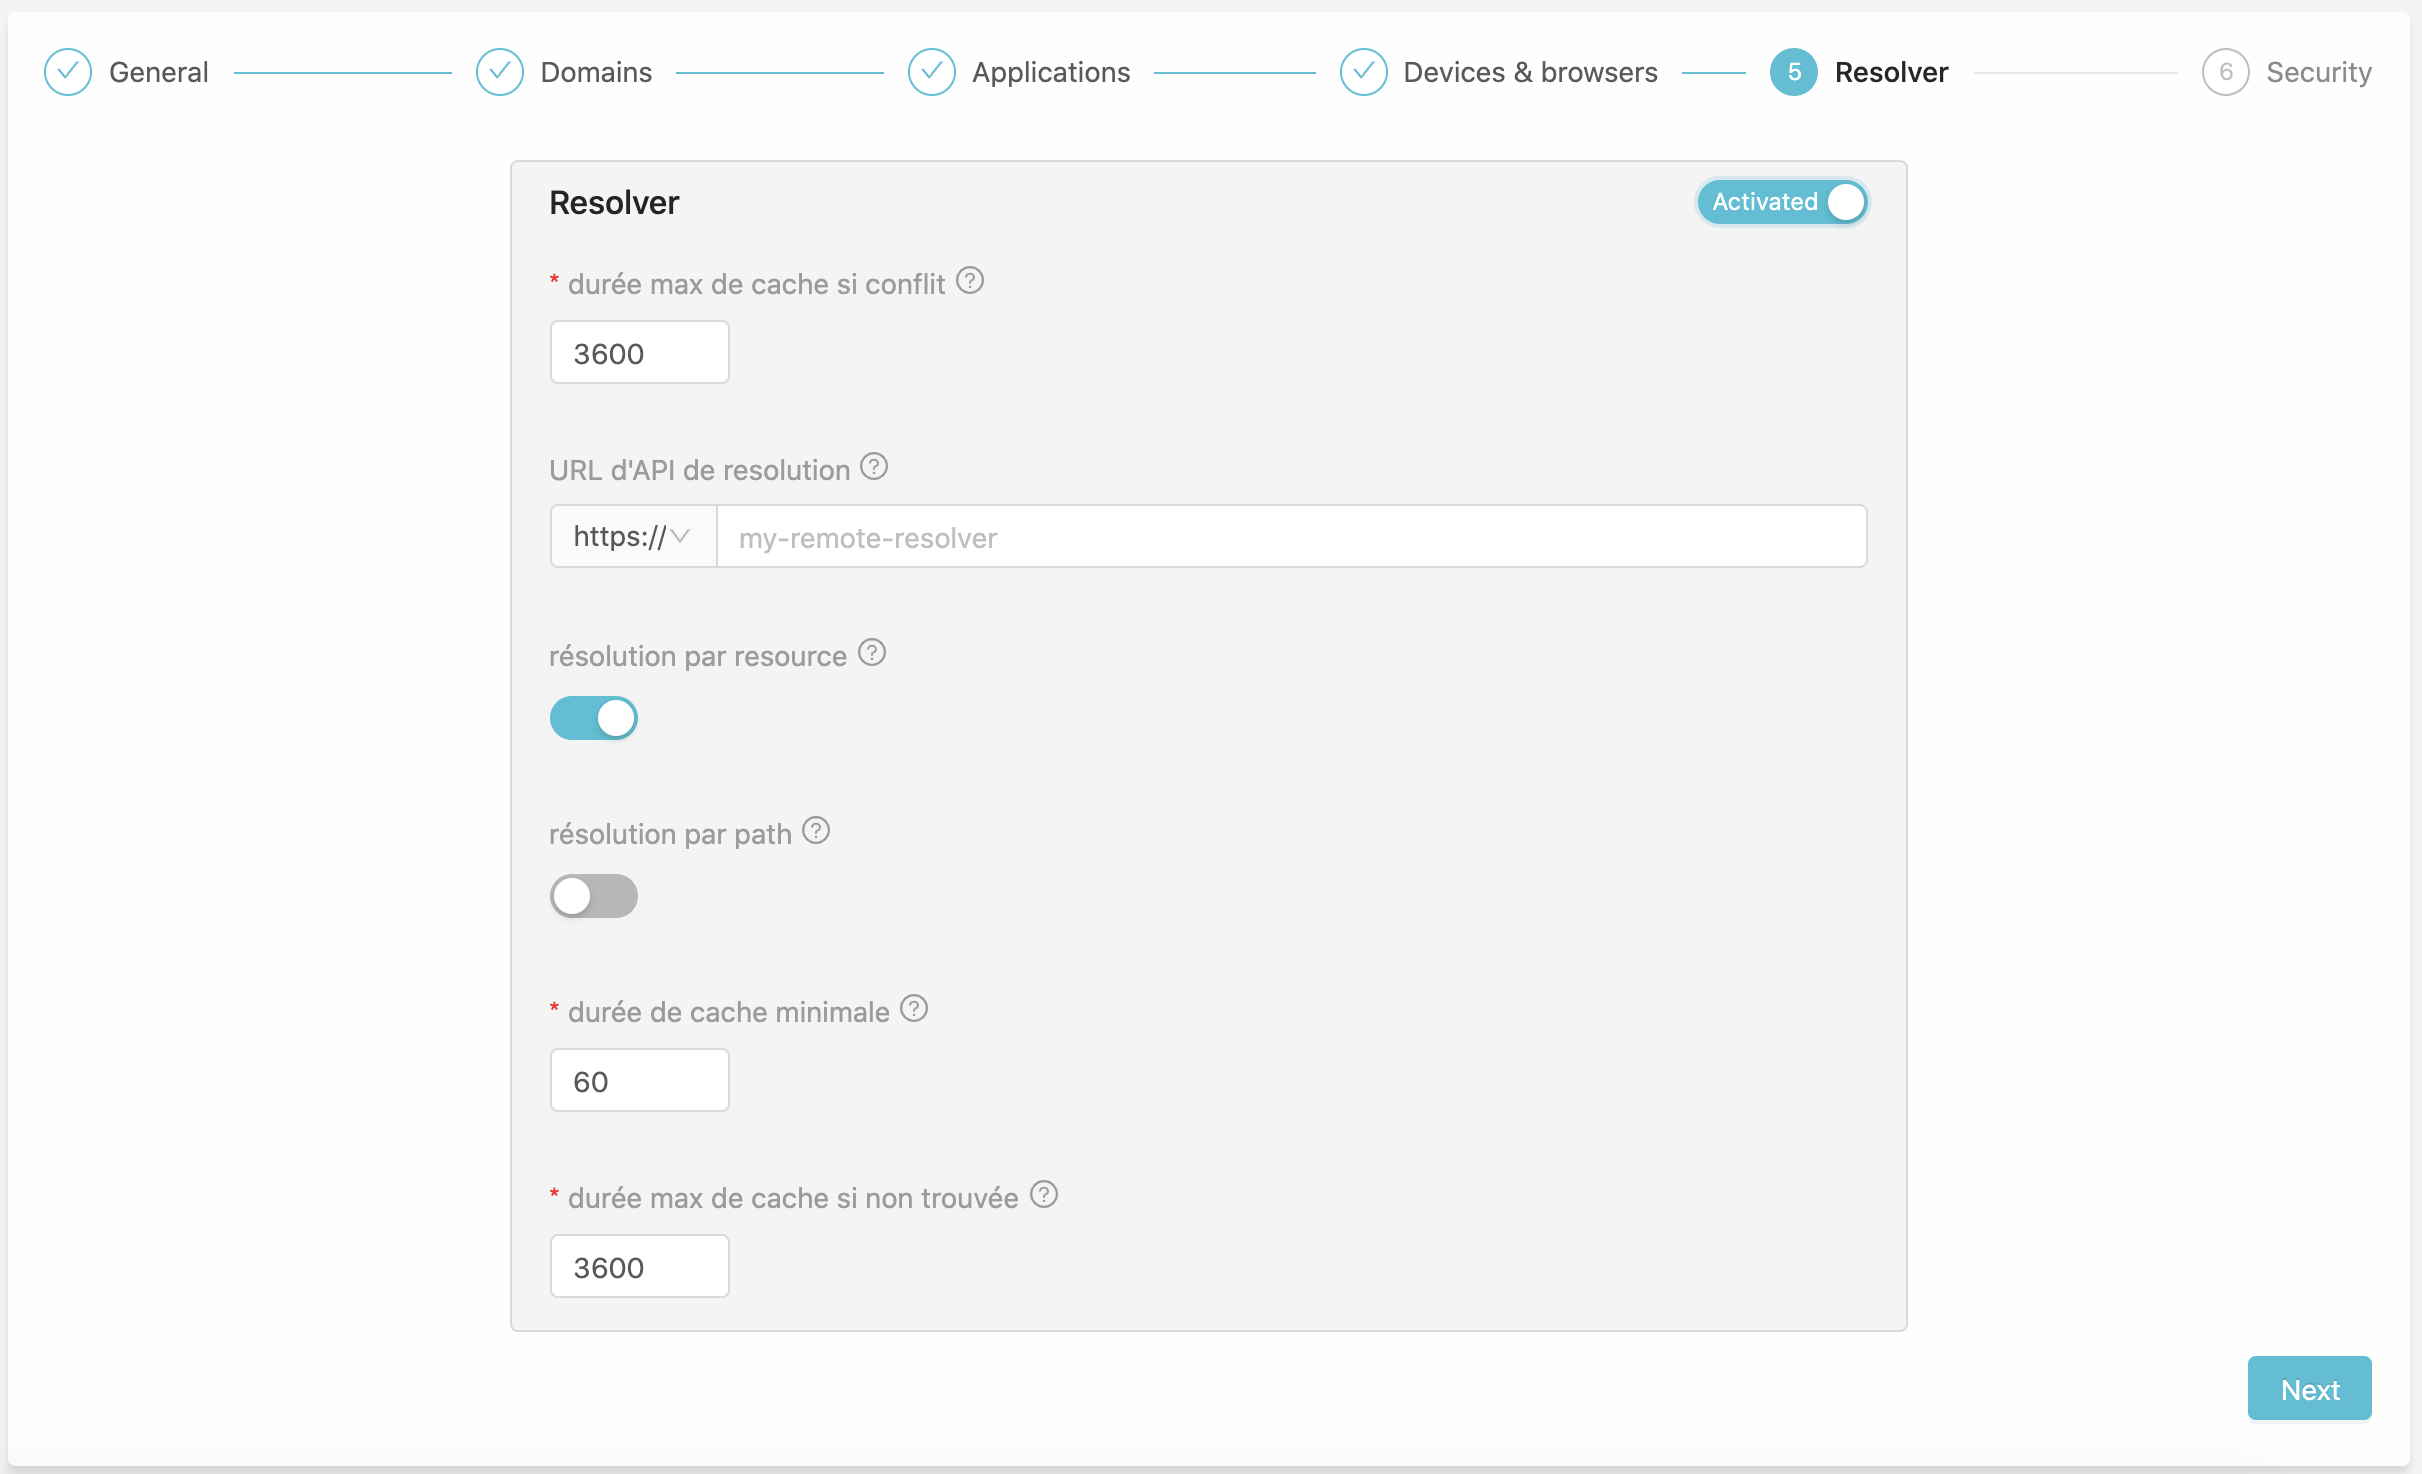
This form is not mandatory and is disabled by default since KOBI comes with a URL resolver implementation. Here you can set up your own Resolver API to have full control over your website URLs.
This form requires :
- max-ttl-on-conflict : the max duration of resources resolved in conflict, recommanded
3600 - api-url : your api URL
- resource-resolution : if your API handles resource resolution (type + ID = URL). Should be set to
true - path-resolution : if your API handles path resolution (URL = type + ID). Not required
- min-ttl : will overwrite the value returned by the API if unset or lower
- max-ttl-not-found : the max duration of resources resolved as not found, recommanded
3600
Security
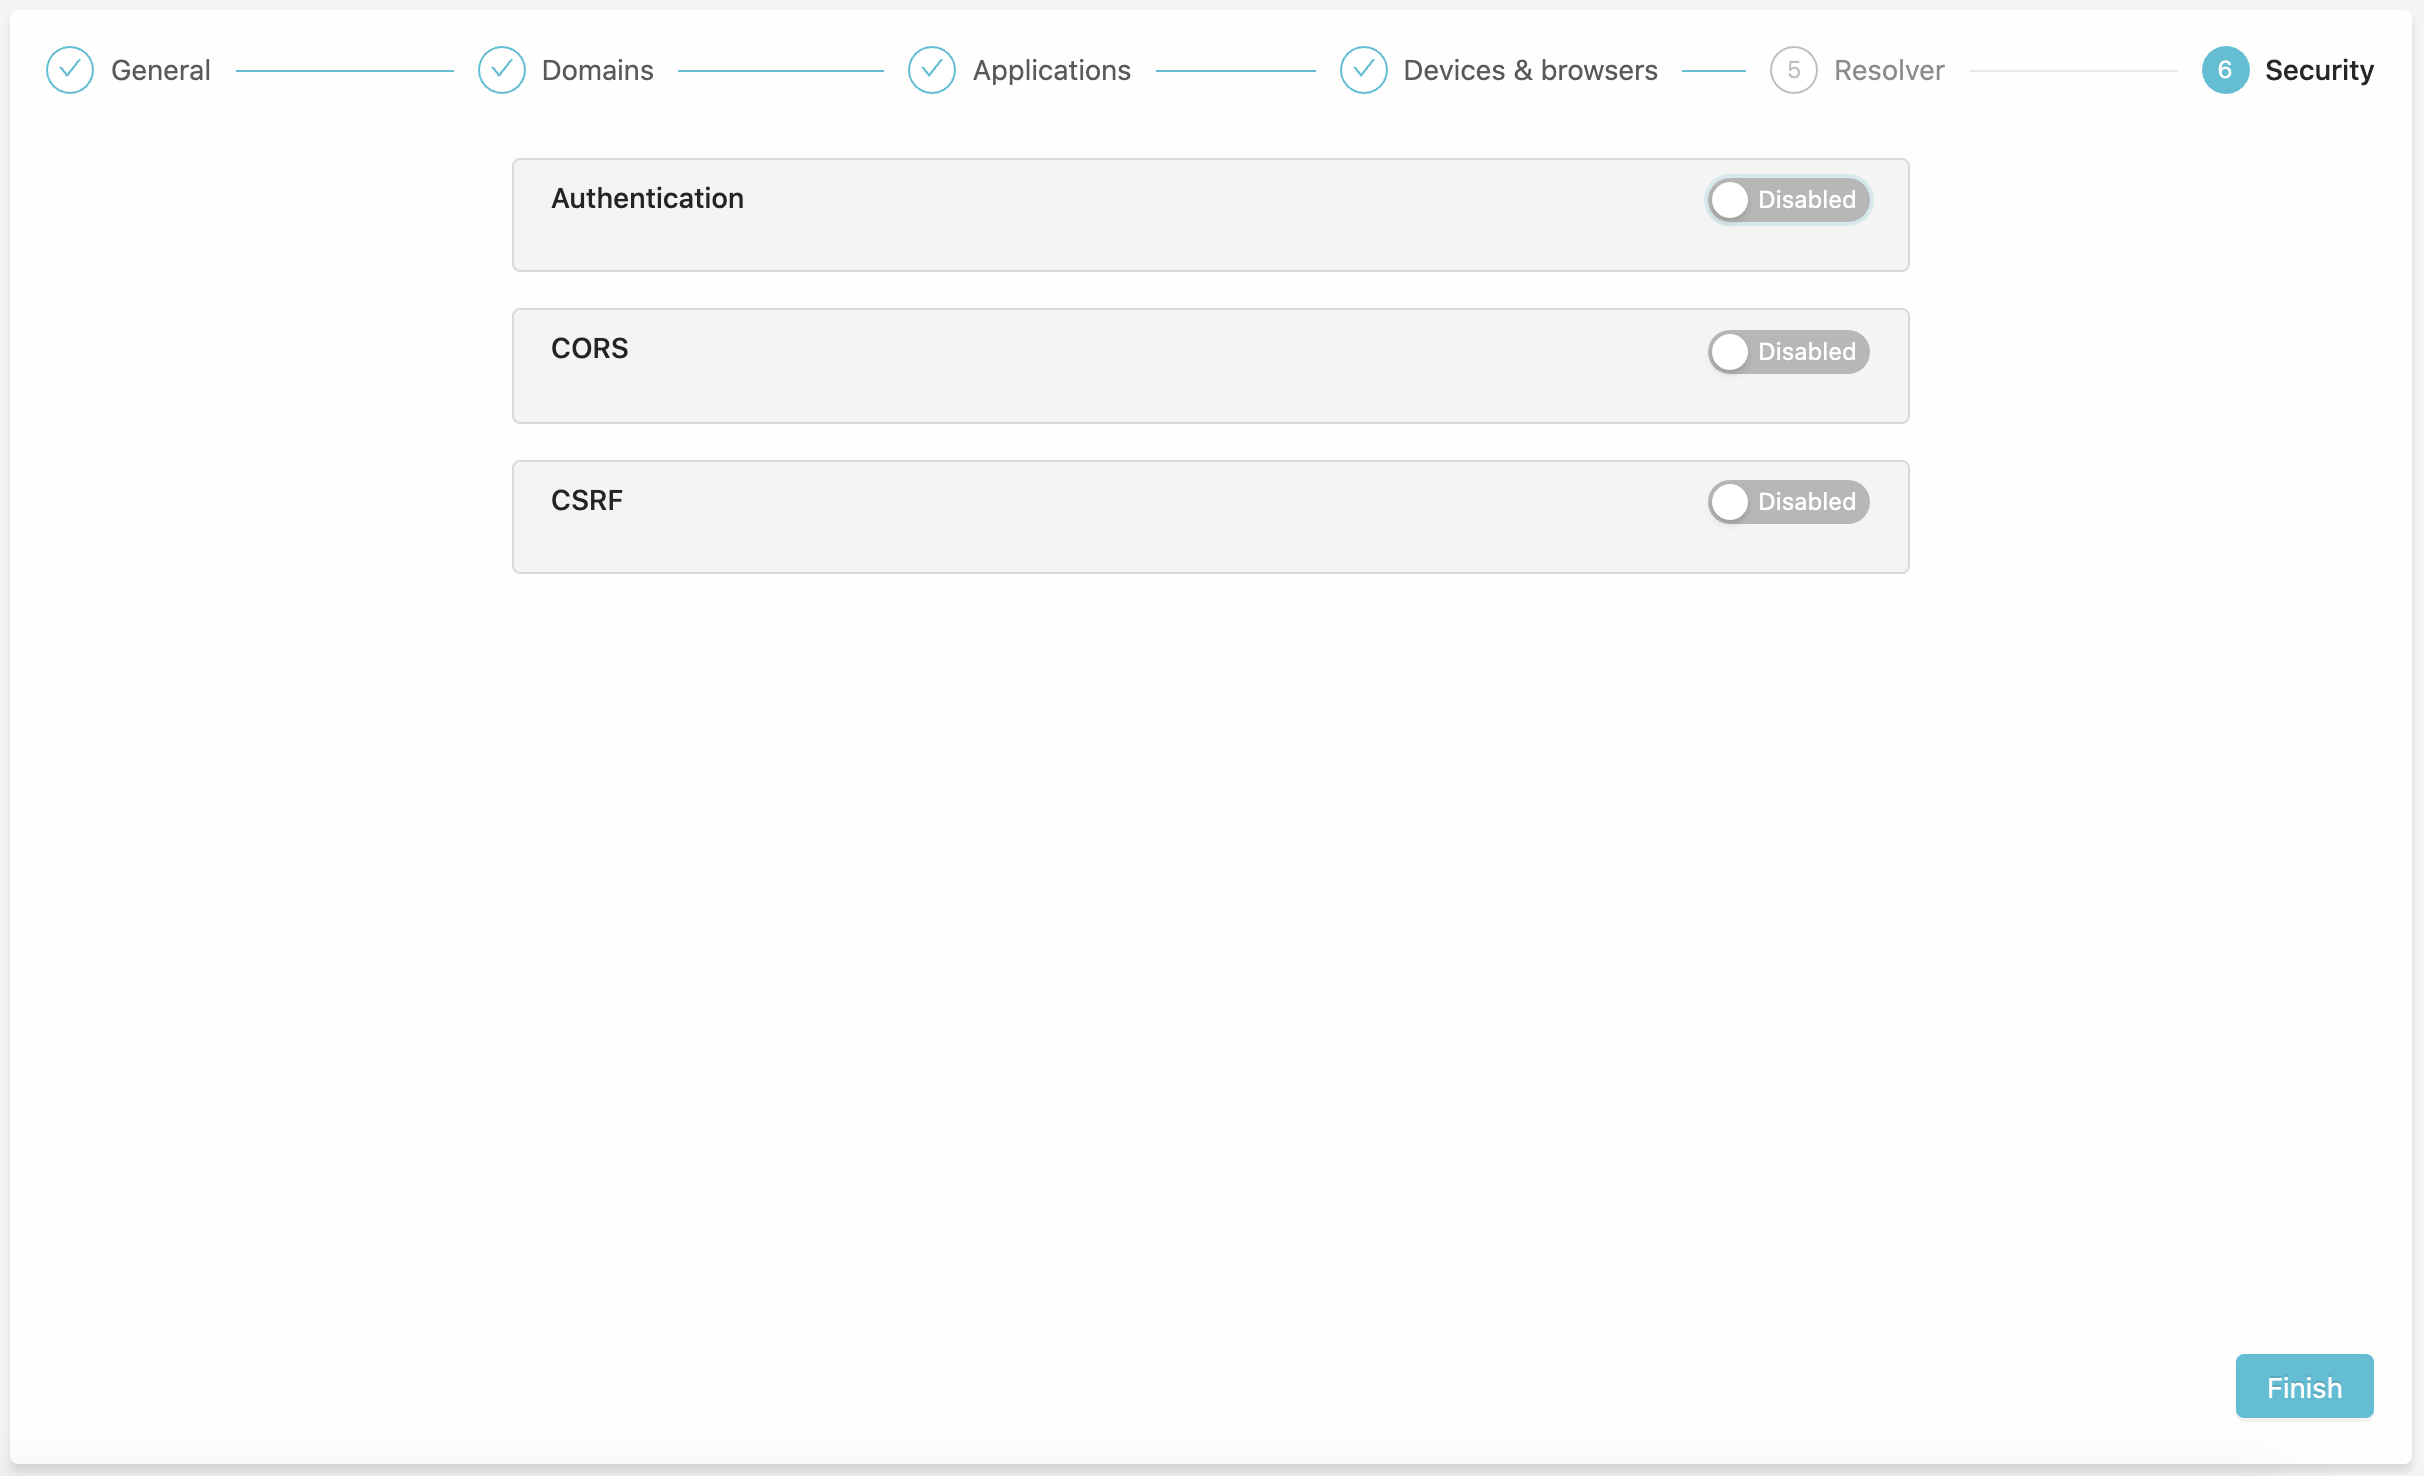
The security tab is split in 3 sections :
- authentication
- CSRF
- CORS
Nothing is mandatory here and each forms are explained here
Publication
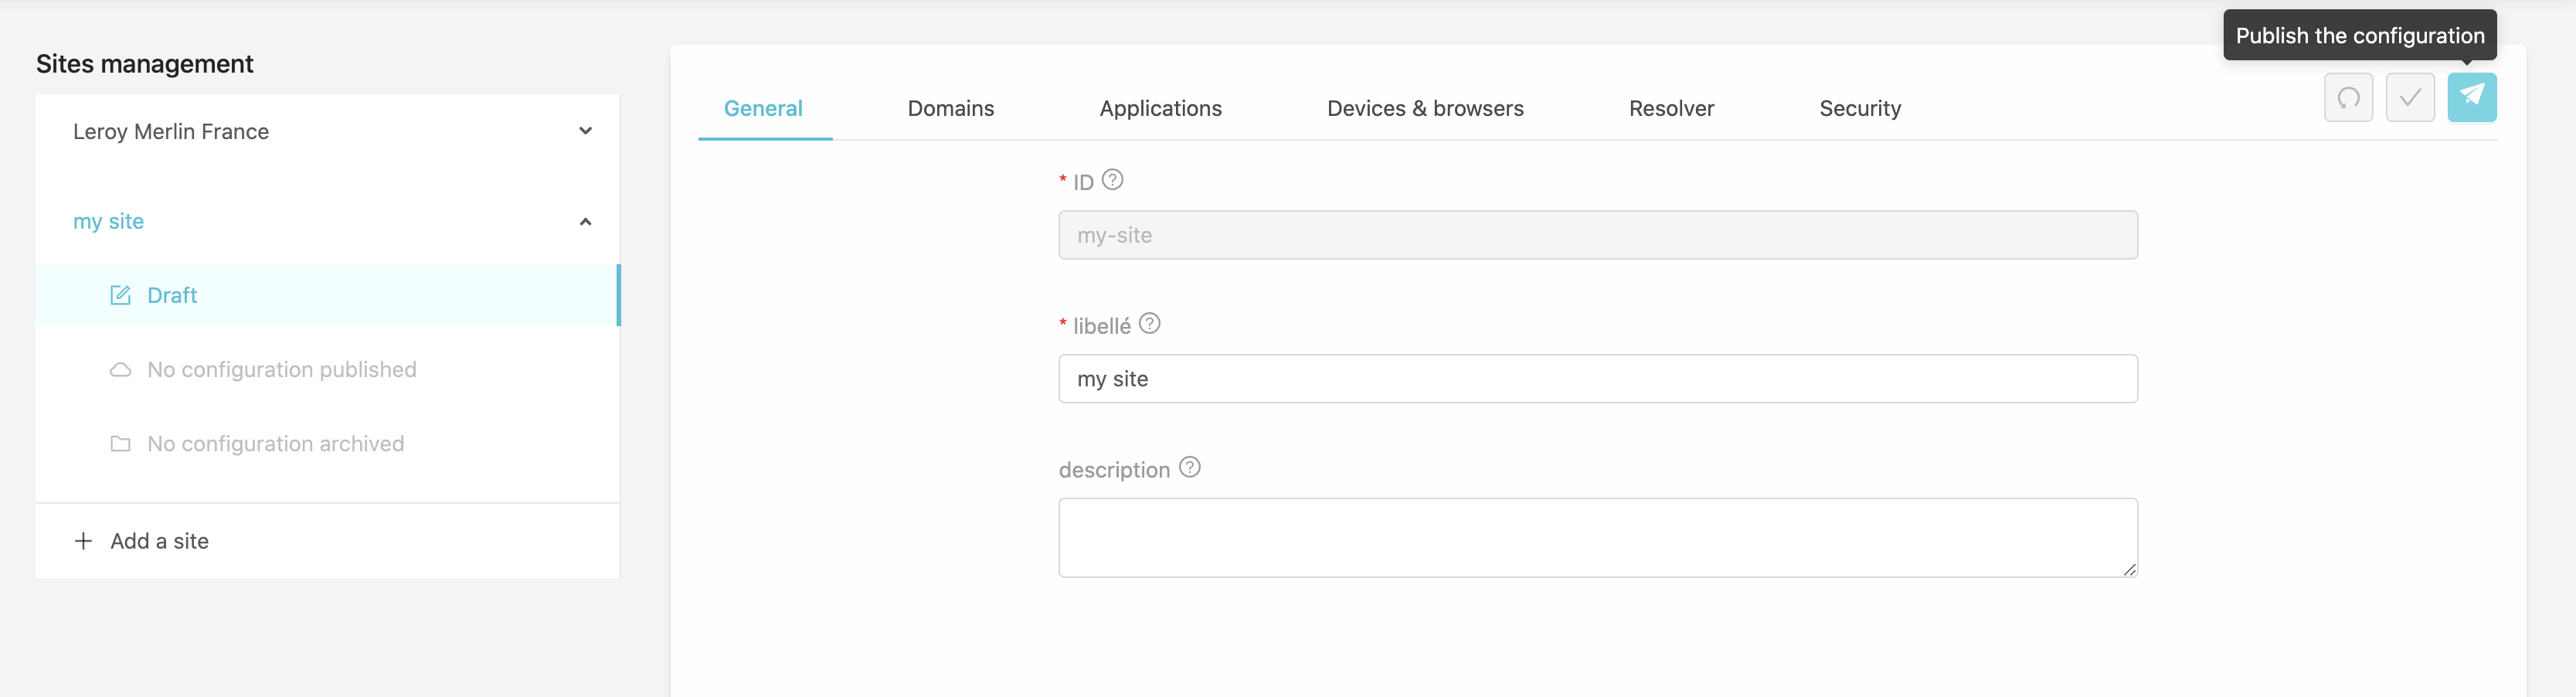
Once your form saved your configuration will appear as Draft, you can publish it in the upper-right corner.
Once published your configuration will exist as Live and the whole KOBI system will be notified of its existence and start processing incoming requests on the configured domain.
Edition & Rollbacks
To edit Site configuration, use the Draft version, when you are ready save then publish.
If a Live version already exist, it will be saved as a V1...N version.
If you don’t like your changes, you can rollback a V1...N with the recover button on the upper-right corner. This will overwrite the Draft version with this one, you can now publish your Draft and you’re done !