This section we’ll learn how to design Pages.
Access
You can access Pages view from the home page :

Or from the header :

List
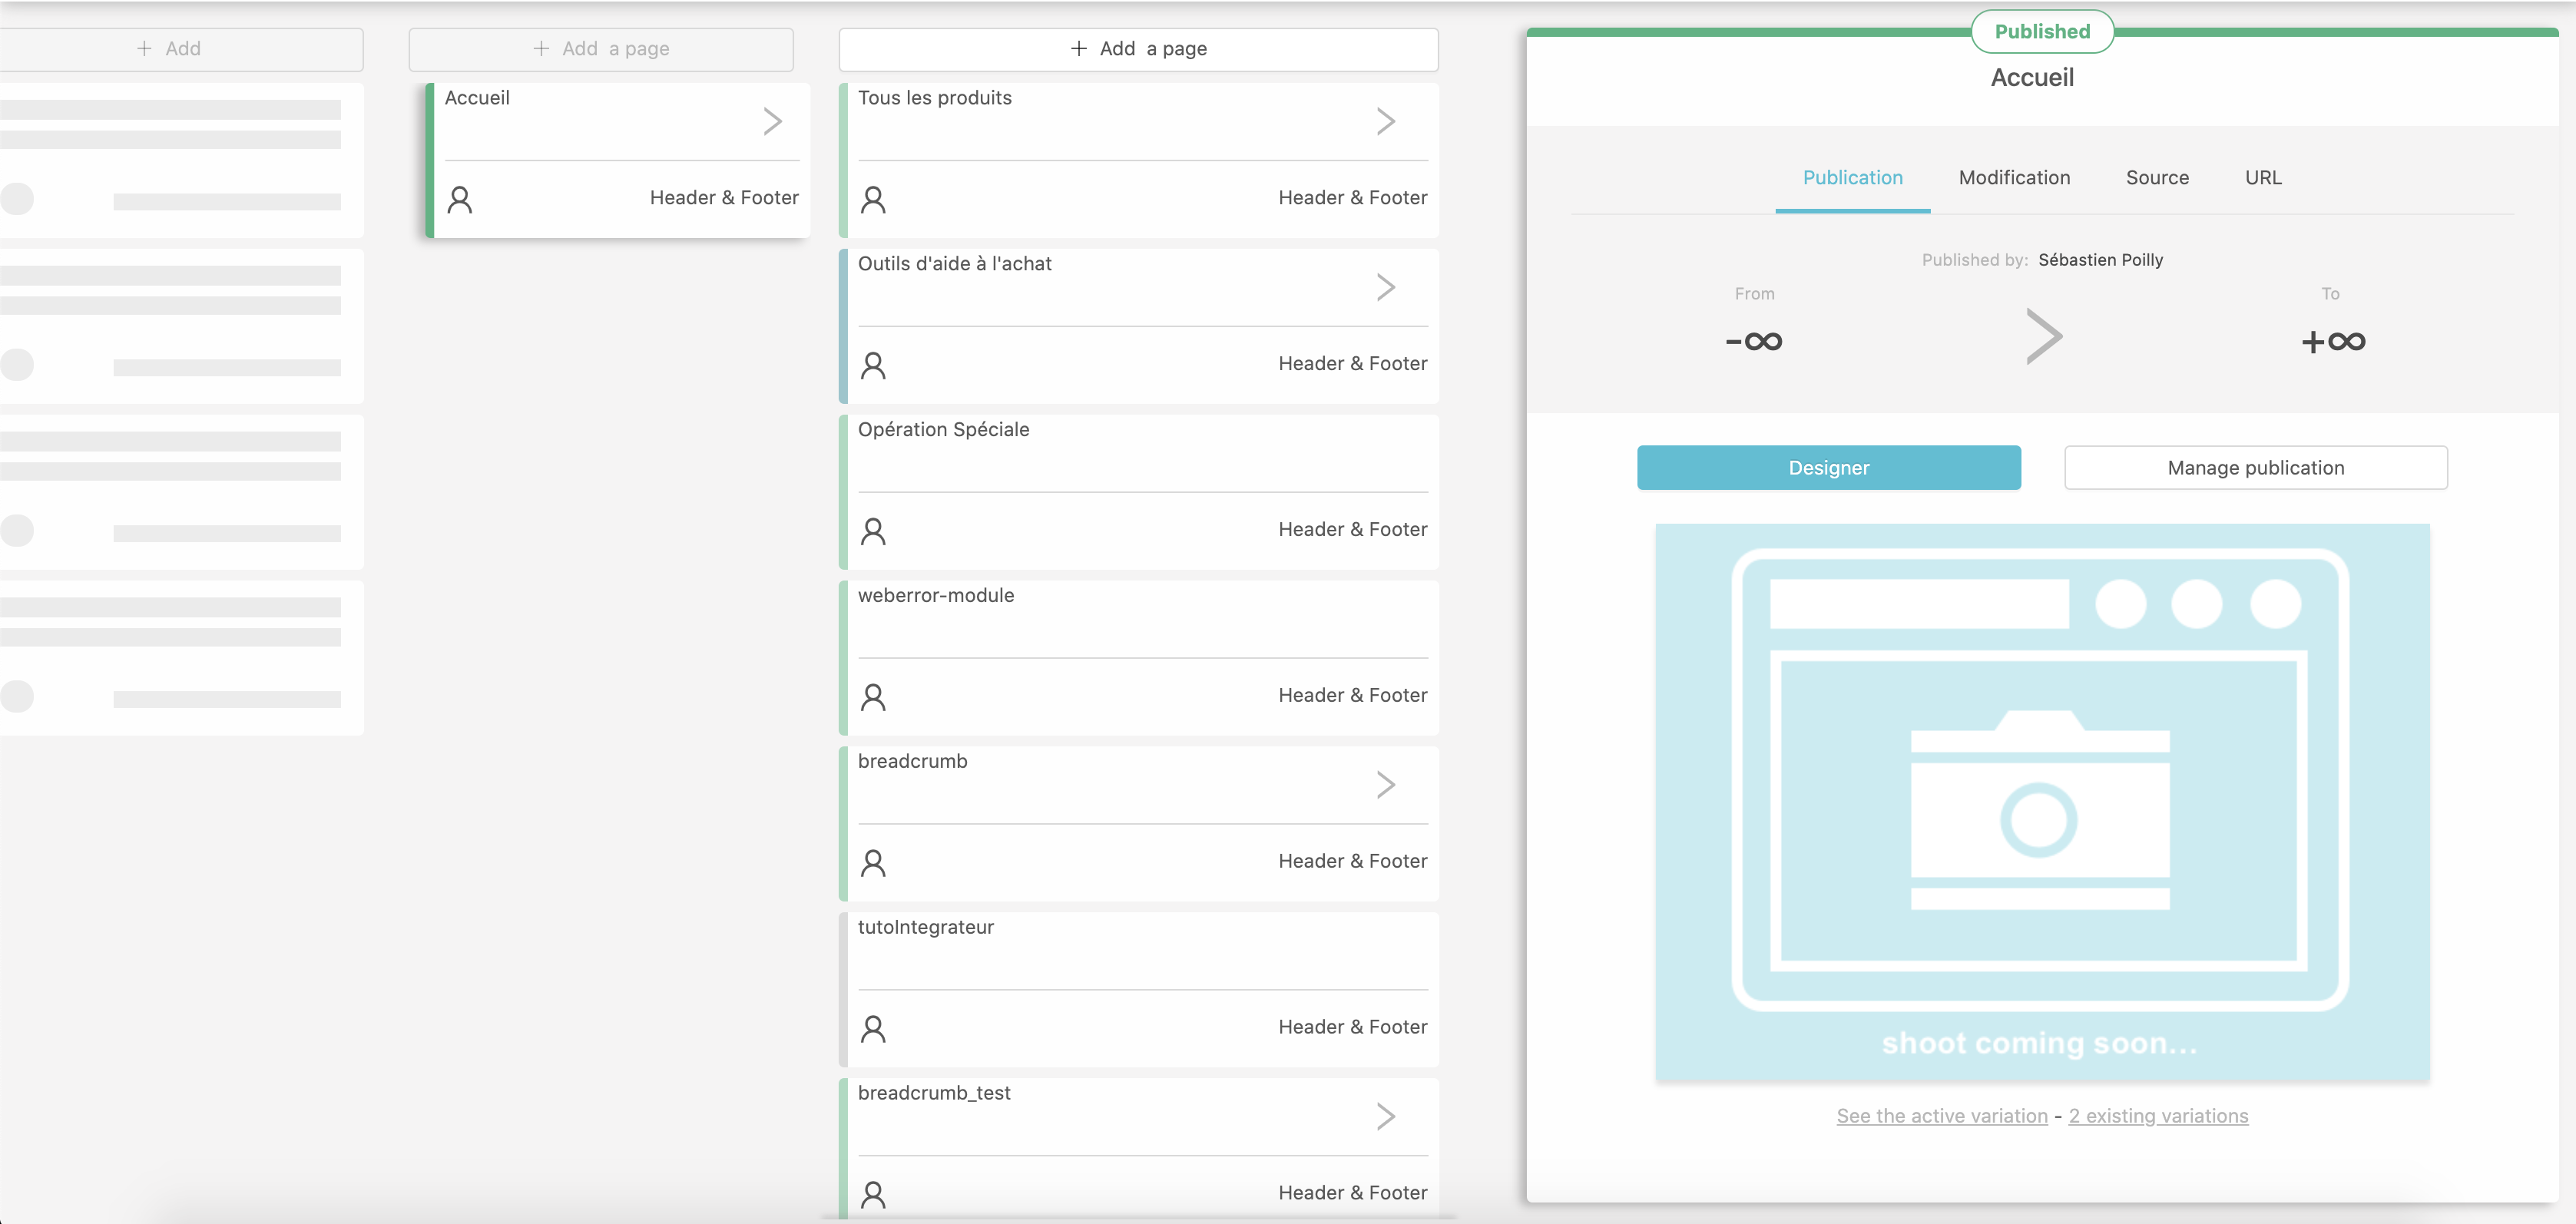
From this view you can see all created pages, which are organized like a tree.
This view is very similar as the Models list but there is no inheritance here, the tree organisation is used for URLs
On the right side of the screen, a card display informations about the currently selected page. You can access the design view from there by clicking the Designer button or by double clicking the page’s name in the tree.
Creating a page
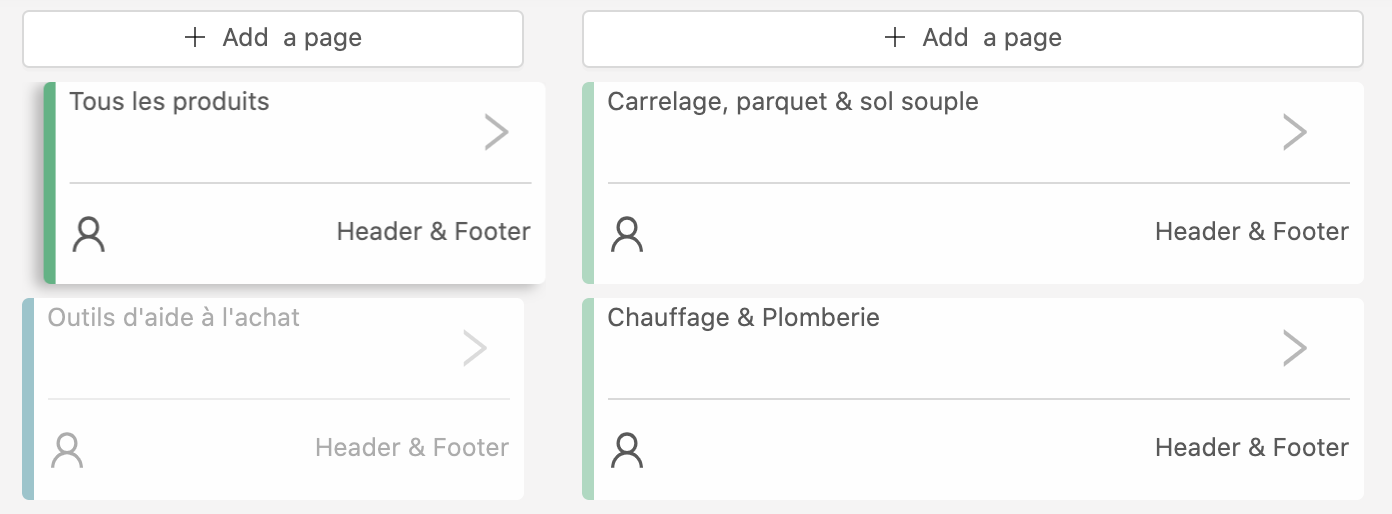
You can access the page’s creation form by clicking the + Add a page in the top of the tree at any level. This will open the creation form card.
Settings
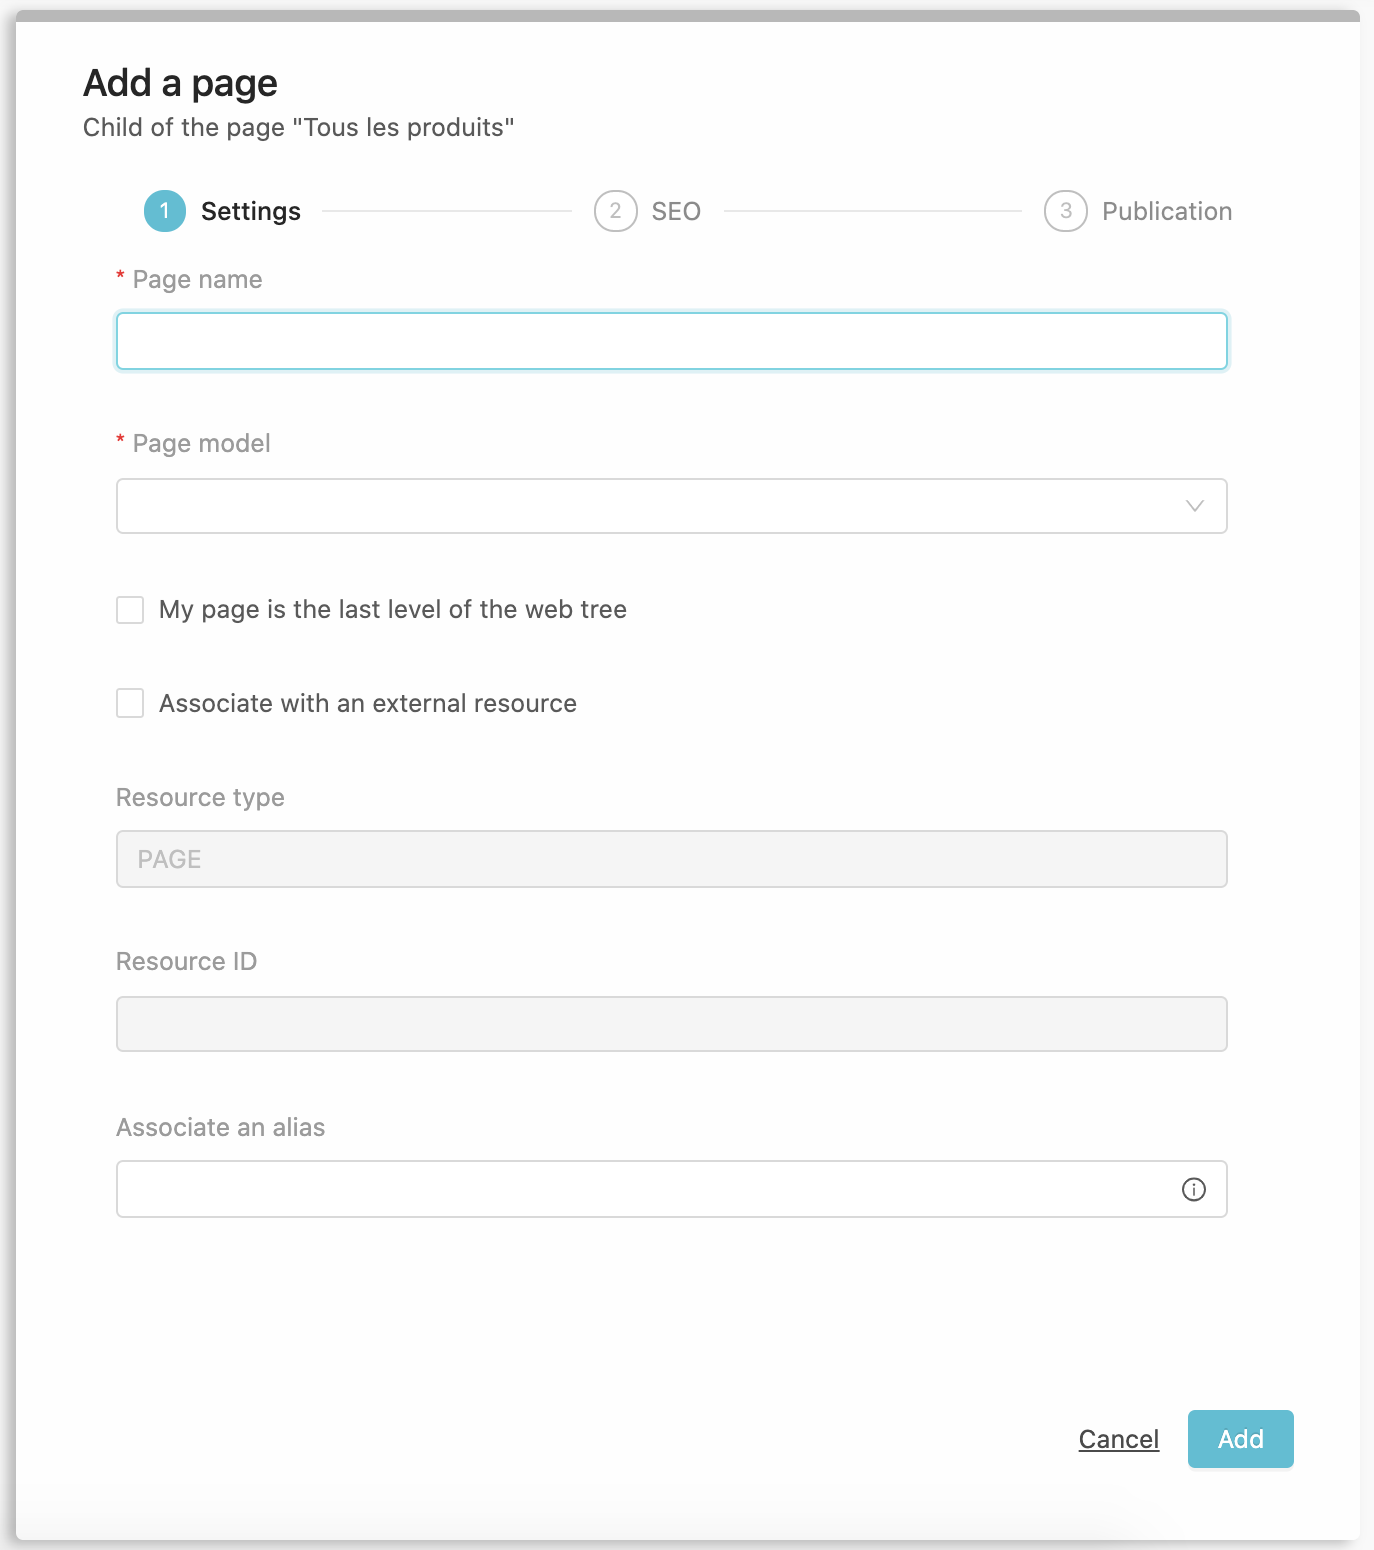
Child of the "page XXX"
You are asked for :
- A page name that will be displayed in the tree
- A Model
- You can set this page as
the last level of the web treethis will add a.htmlinstead of a/if using the default resolver implementation - An optionnal association to a Resource type and resource ID.
- An Alias to easily create links
Click Add to continue to the next step.
SEO
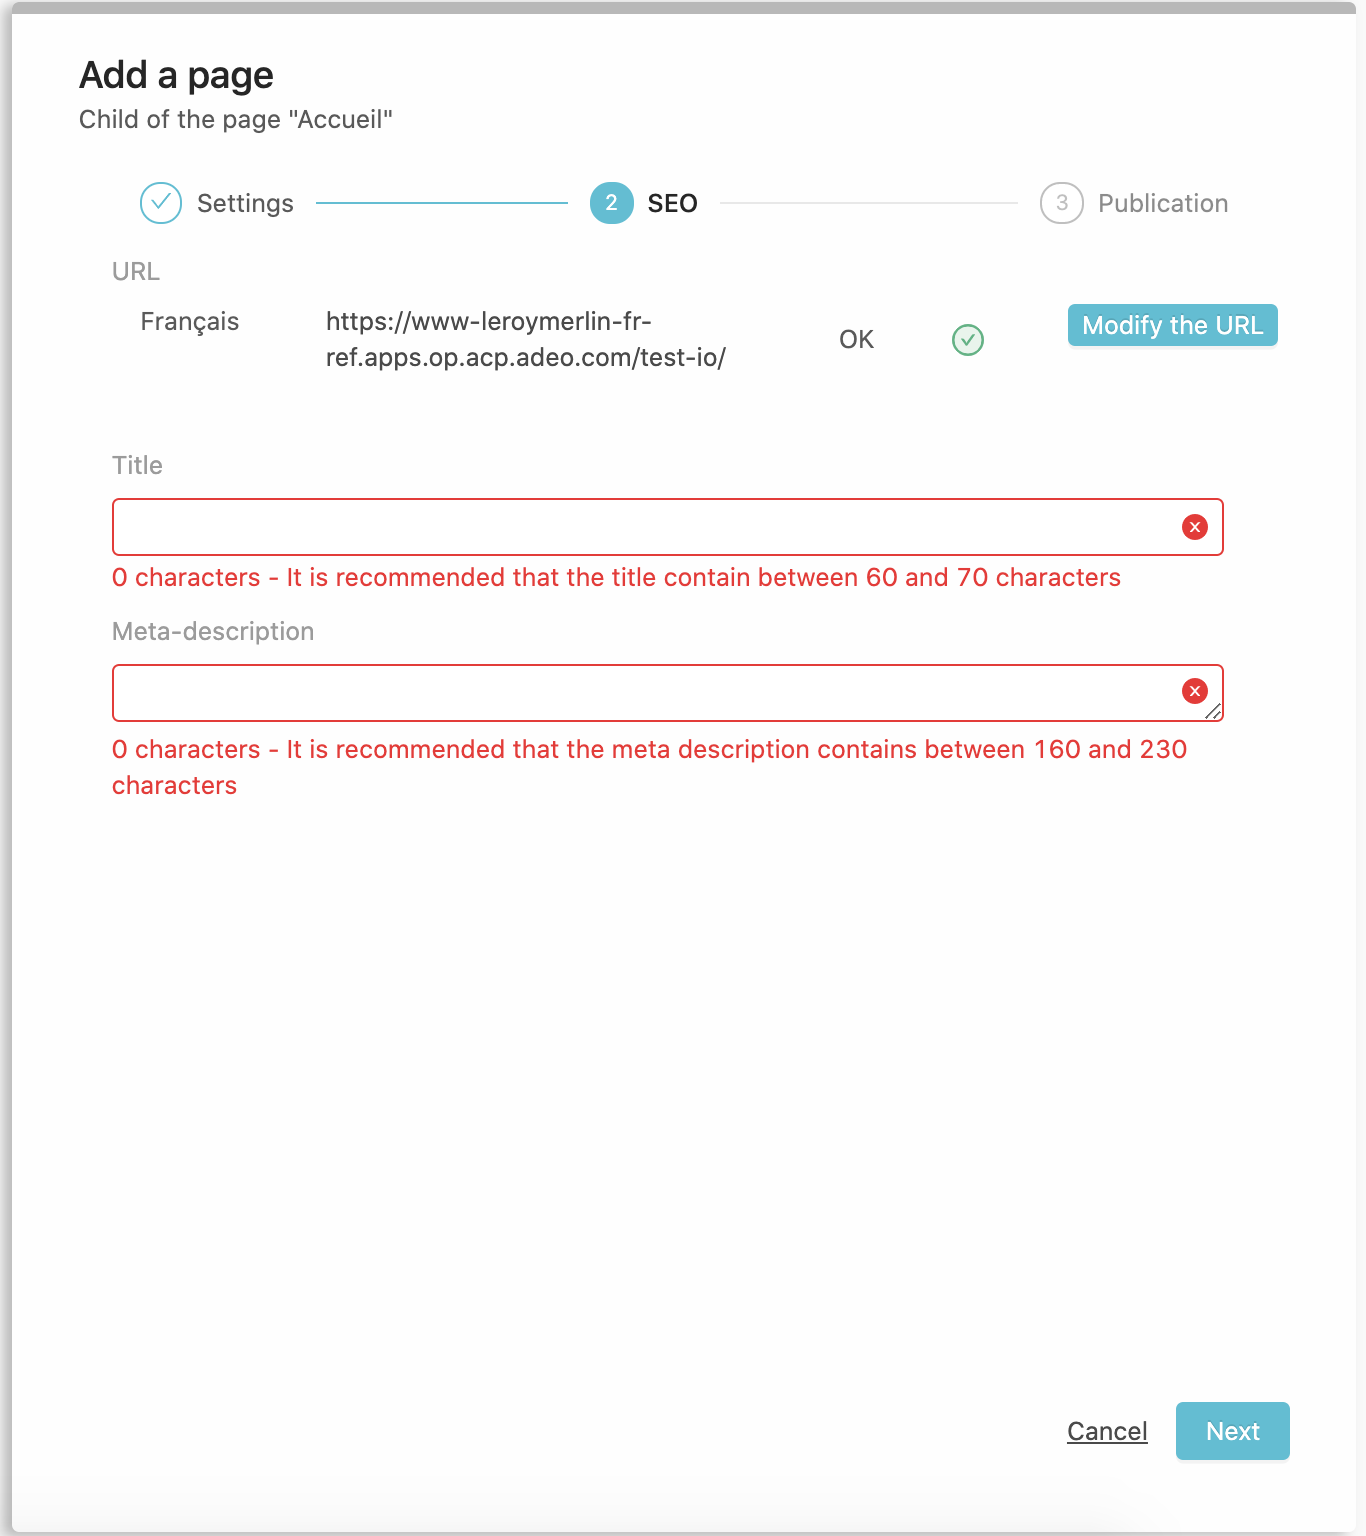
This step will display the generated URL for this page based on this position in the tree and its name (when no remote resolver is set). You can edit the URL to fit your needs.
You are asked for :
- a title
- a meta-description
Click Next to continue to the next and last step.
Variation
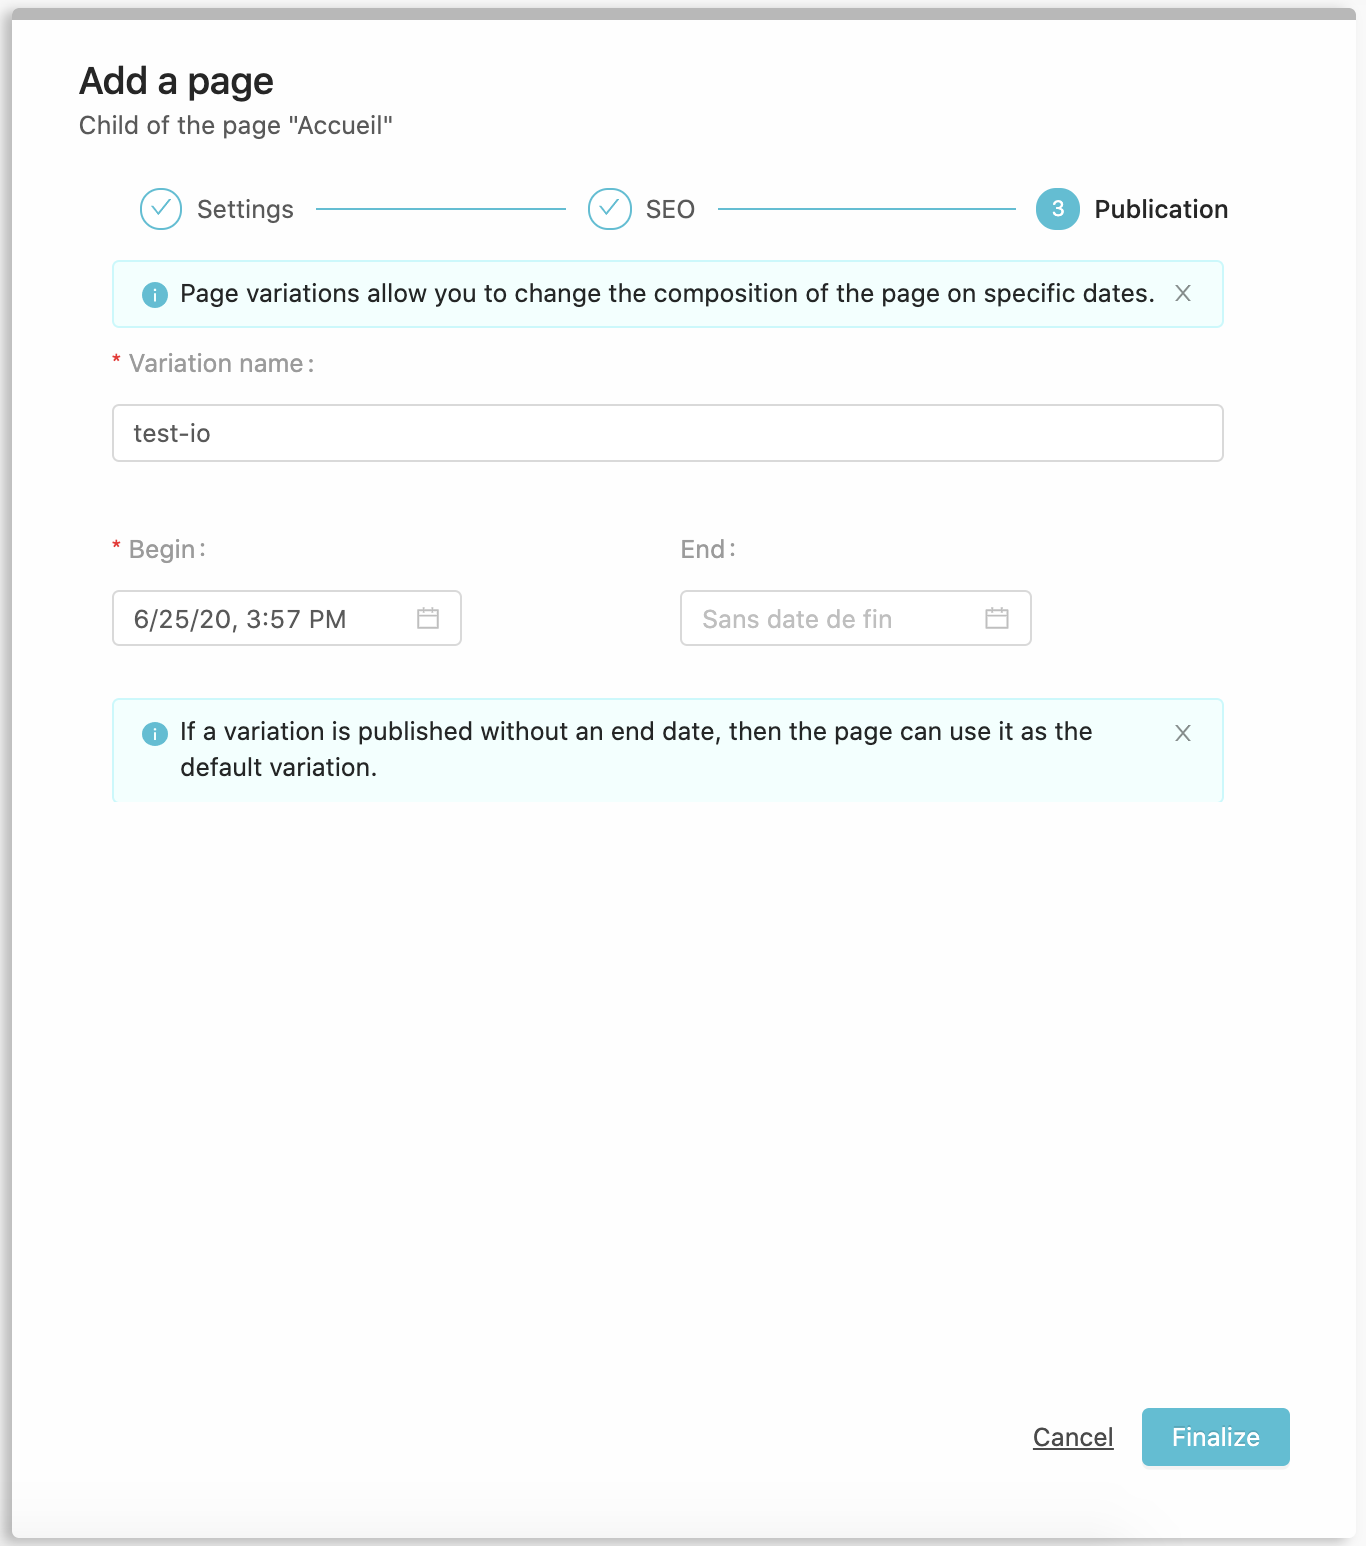
A variation is a representation of your page at a given time, you can create multiples variations of your pages with ending and starting dates. Here you are asked to create the default one.
If you’re OK with the default values, click Finalizee to complete the page’s creation. The page will appear on the tree, you can now Design it.
Design
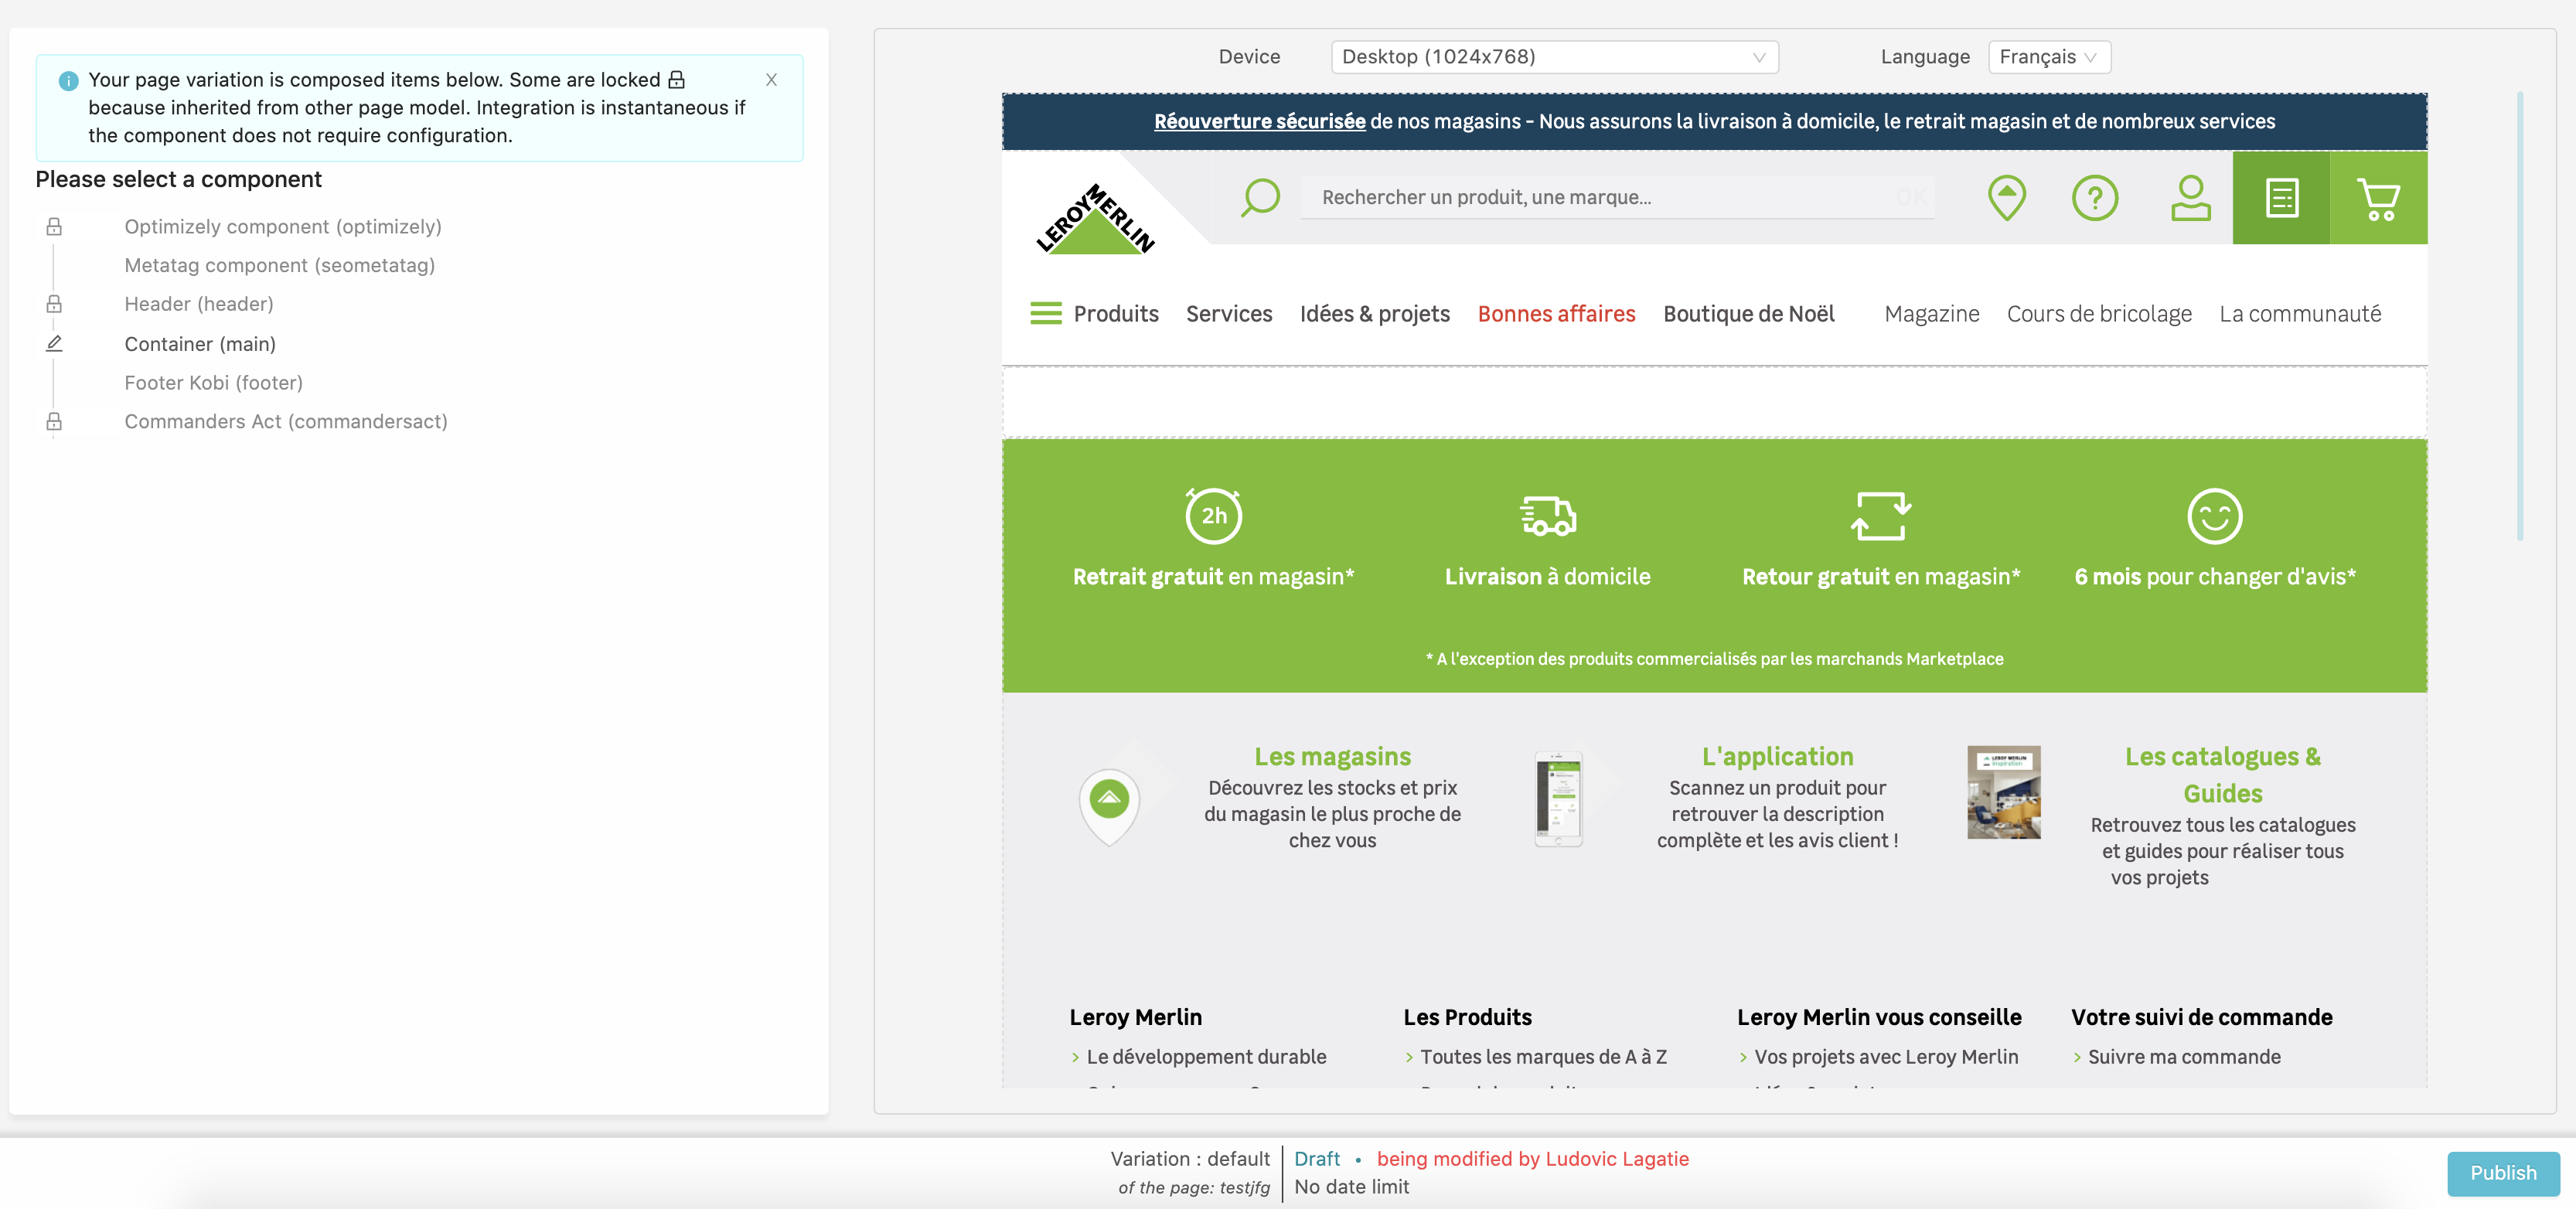
On the left side you will see the list of already added components, they may come from the site’s template itself or from the choosen Model.
In our example we already have these components that comes from the Header/Footer Model:
- Optimizely
- Metatag
- Header
- A Container
- Footer
- Commander’s Act
By hovering one of them, a tooltip display where the component is configured.
Aside from the container, all these components are invisible (fragments with ‘visible=false’), so the right side of the page is empty.
On the top of the right side you can select different devices or languages (if multiple locales have been defined in your site configuration).
Containers
Click on a container to start adding components :
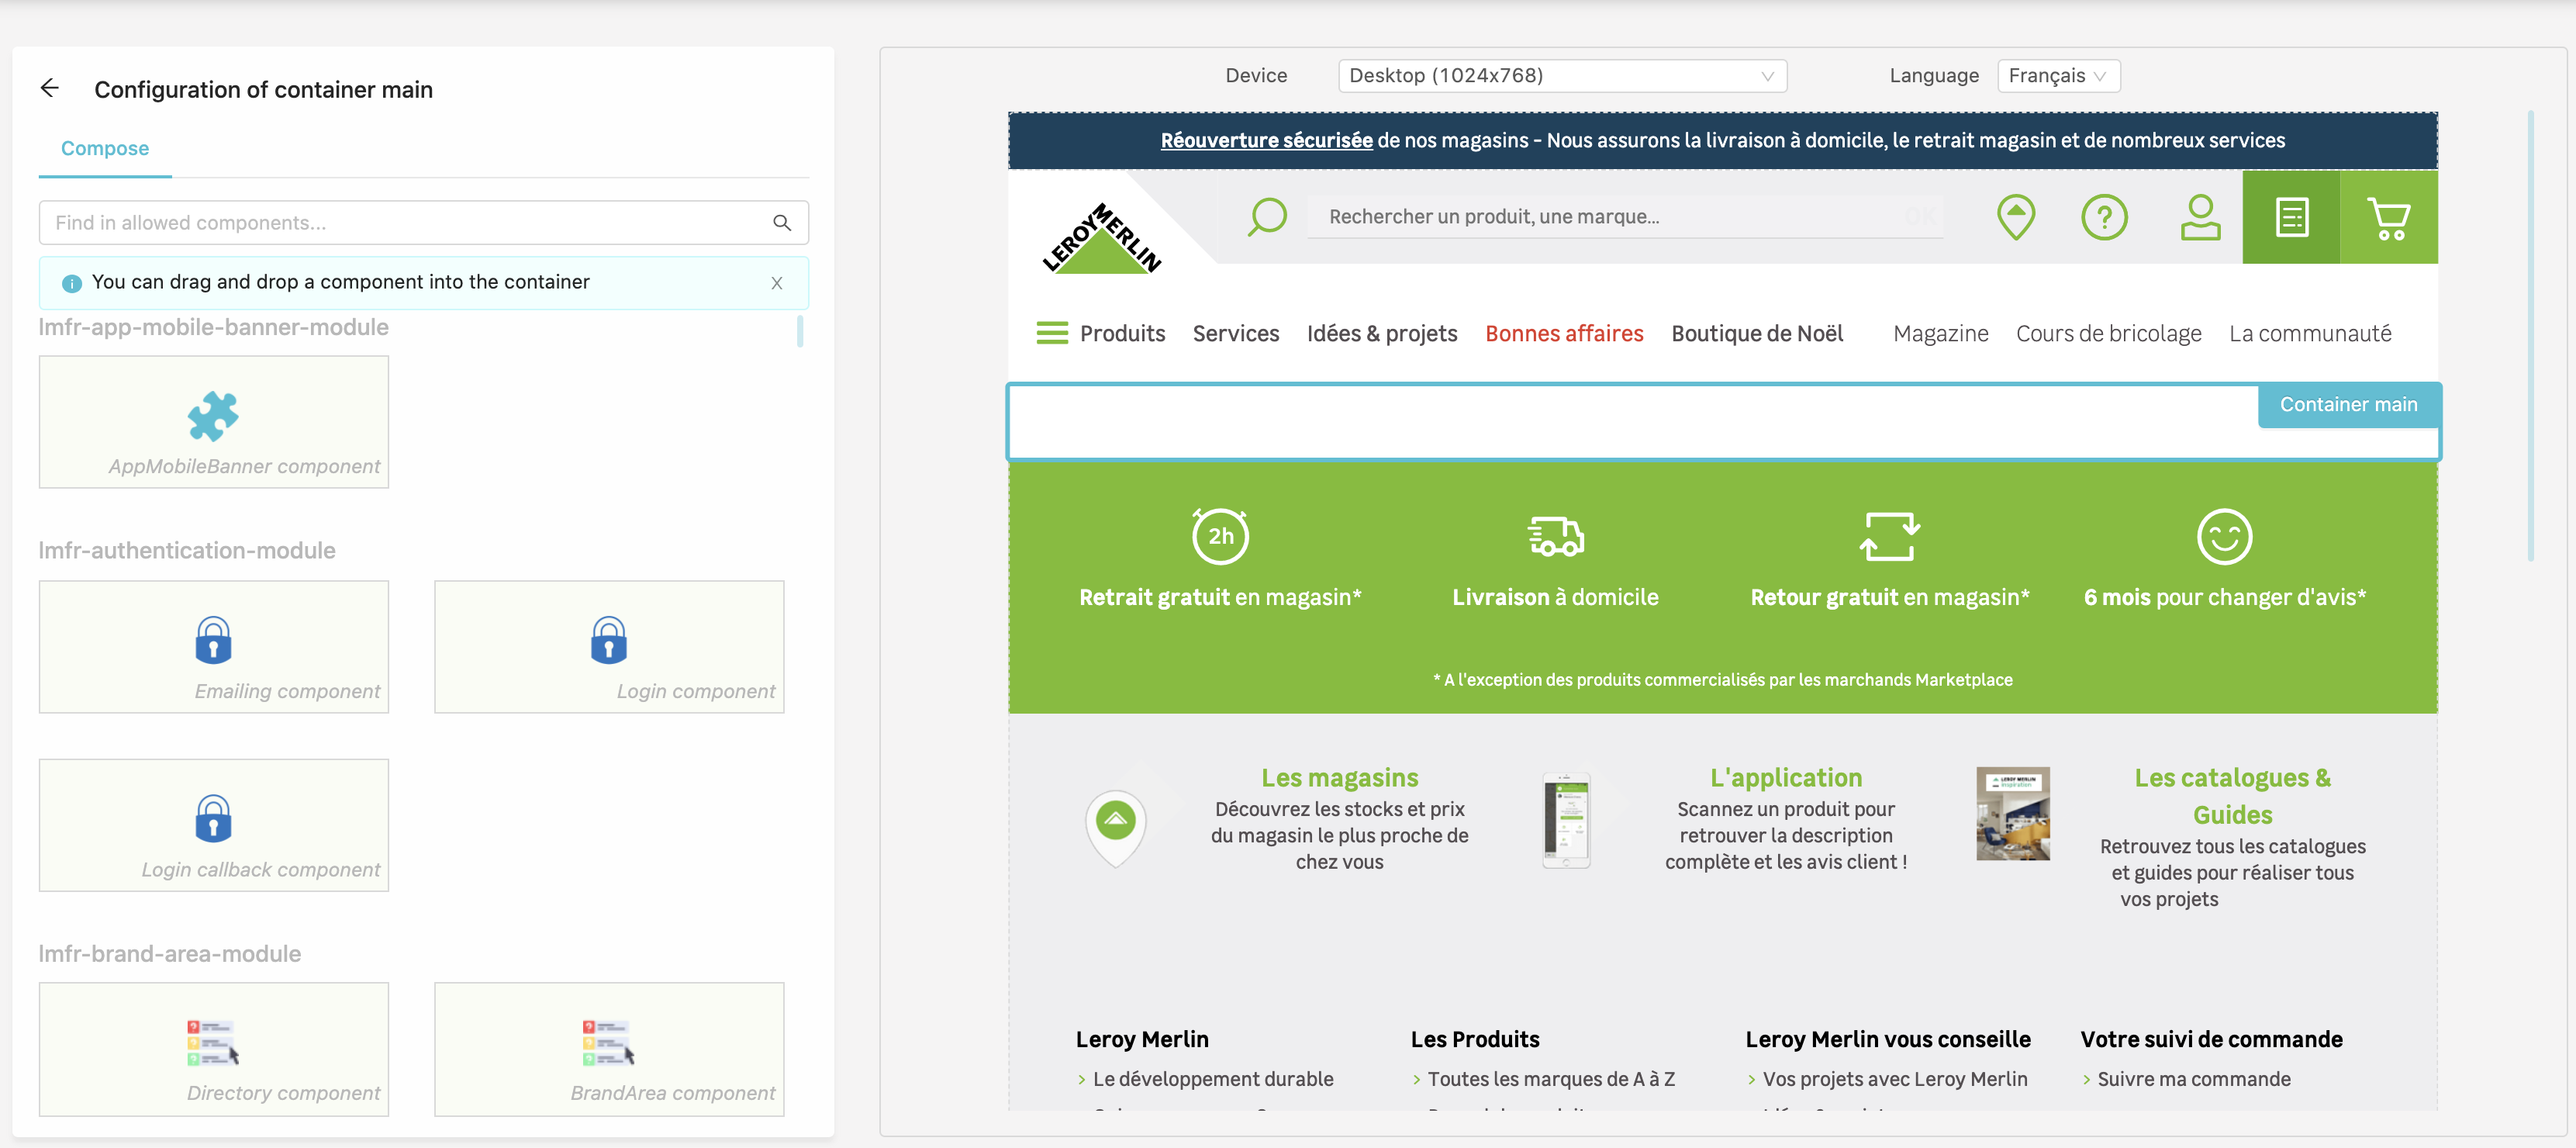
The left pane changed to display a list of available components in your Site. You can use the input to search through them by name.
You can drag components to the container to add them.
If the added component requires a configuration, a form will be displayed to fill them.
Publication
When you are done with the design you can publish it in the footer
Variation informations
From the header, select the Variation informations tab :

From here you can edit your variation’s name, and set starting / ending dates. On the left pane you can see the Page Model used for this variation.
All variations
From the header, select the See all variations tab :
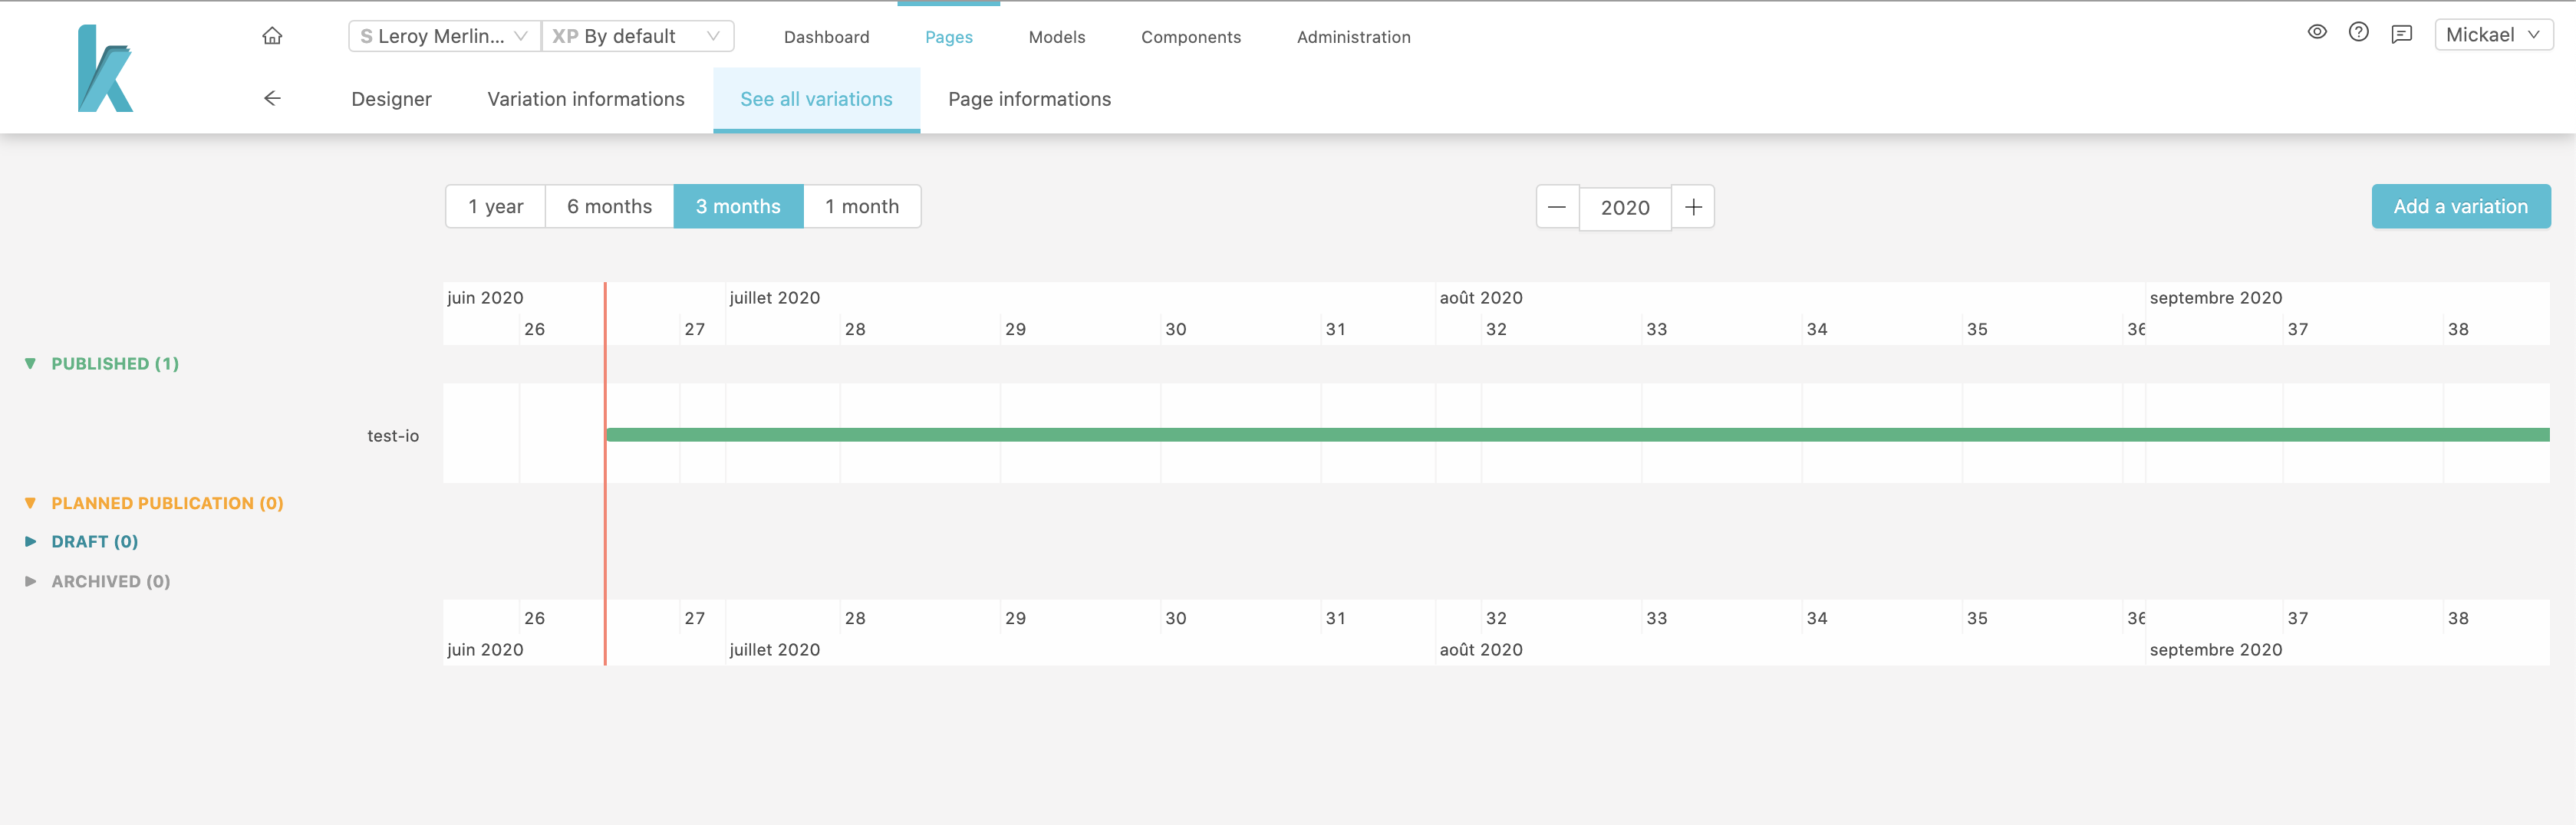
From here you can see each variation, state by state on a timeline.
You can also create a new variation for your page.
Variation creation
Click Add a variationin the upper-right corner, this will open the variation form :
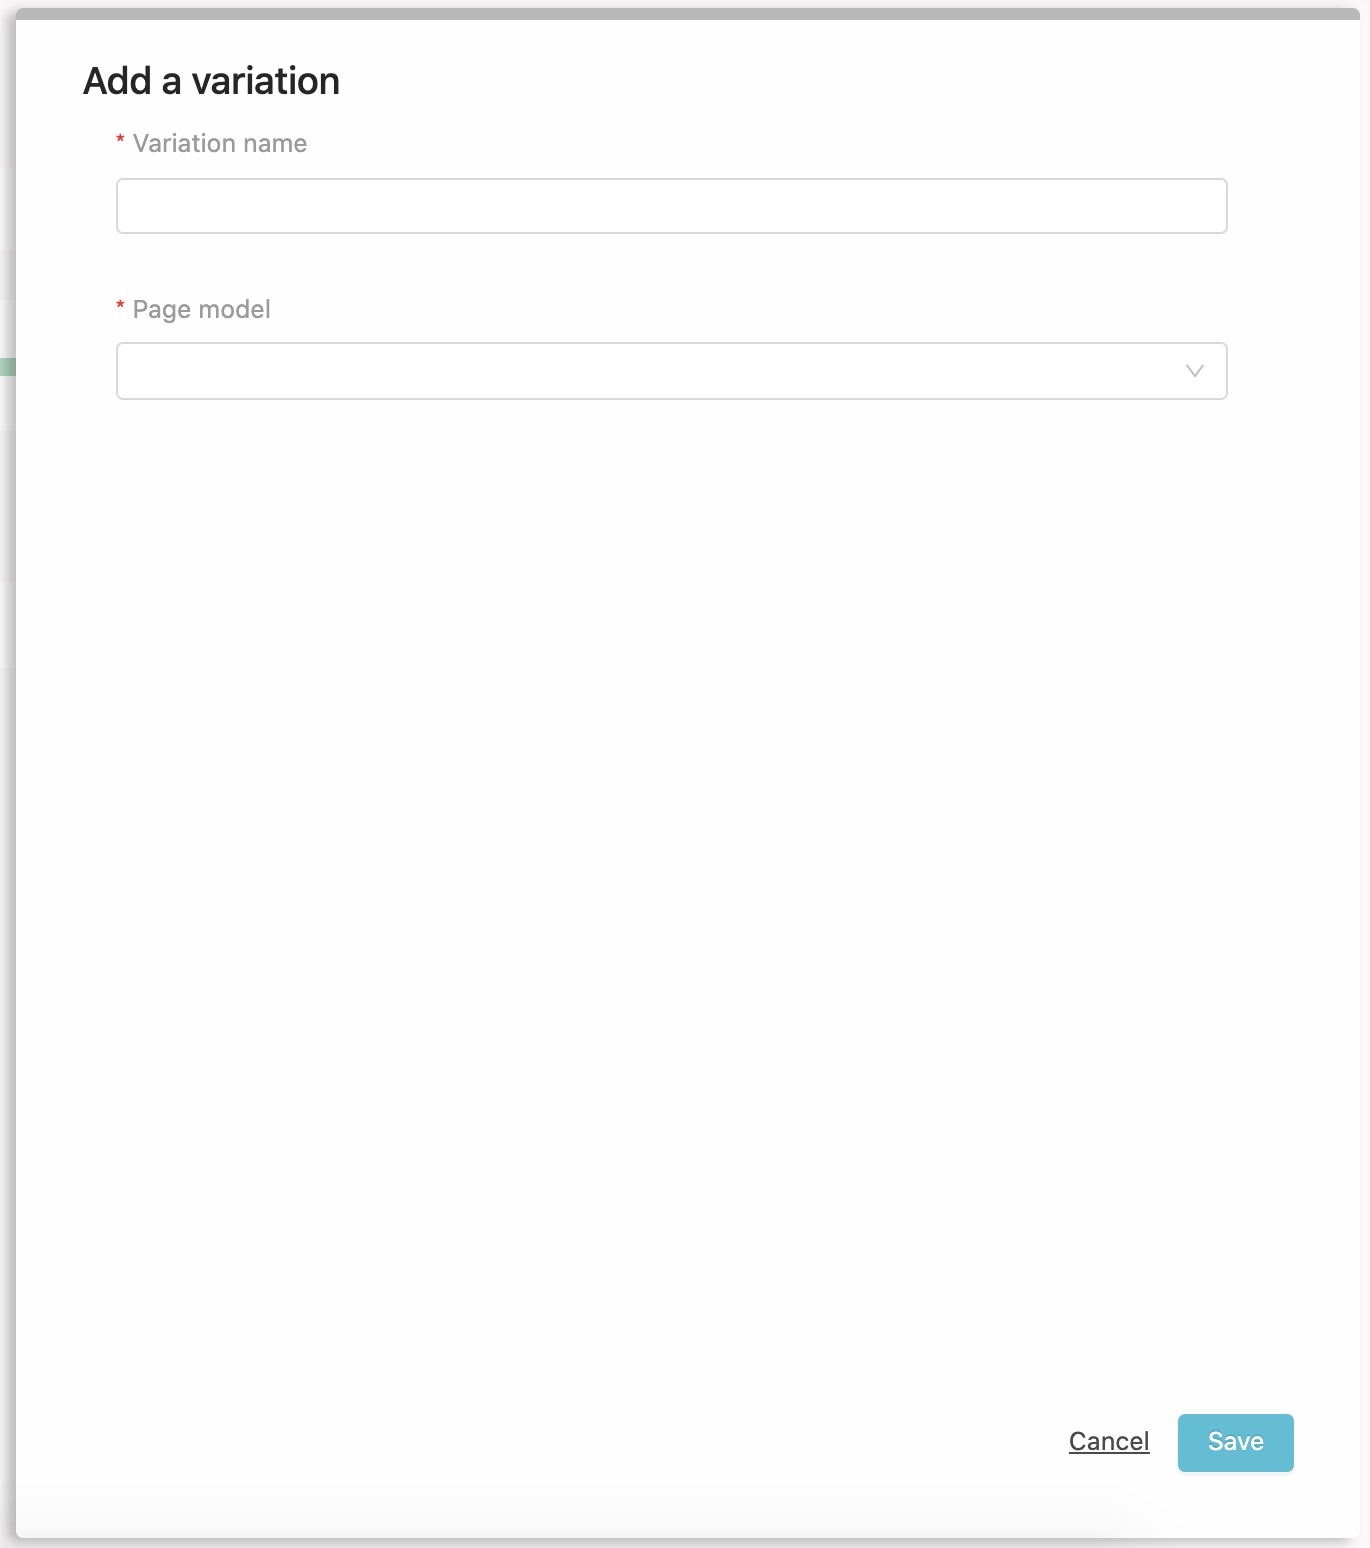
You can set a new name for this variation and use a different Model. Click Save to complete the creation.
You will be redirected to the Variation informations where you can set starting / ending dates for this variation.
For this tutorial, I set a starting date in the future, and published the variation.
Coming back to the All variations view, the new variation should appear on the timeline in the Planned publications “folder”.
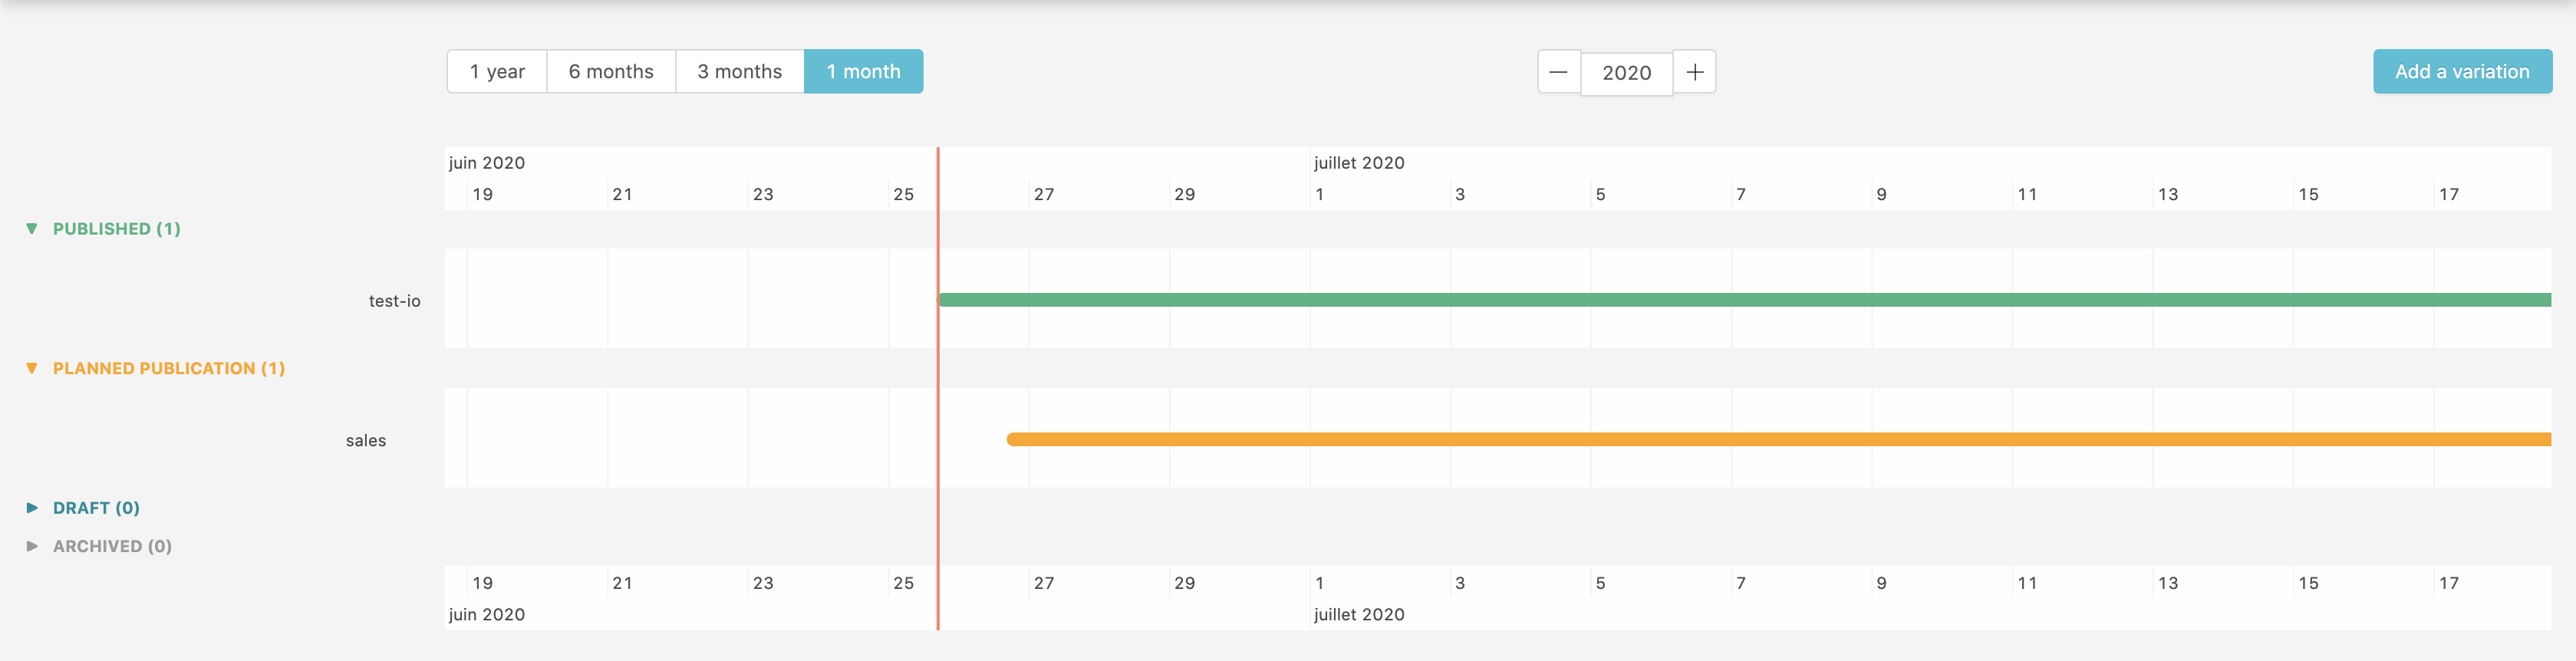
When the starting date is reached (tomorrow in this example), the planned variation will be automatically effective and replace the current one.
If you set an ending date to this planned variation, it will be archived and the default one will take back it’s place.
You can create as much variations as you want.
A use case could be “tomorrow is the beginning of sales on our website, we want to display a banner on our homepage”, create a new variation on your homepage, add a banner component on the container, set a starting date and end date matching the sales period and publish. The banner will be displayed when the sales starts and disappear when it ends. Magic.
Page informations
Last tab in the header, the Page informations.
There are two sub tabs on the left, General and SEO
General
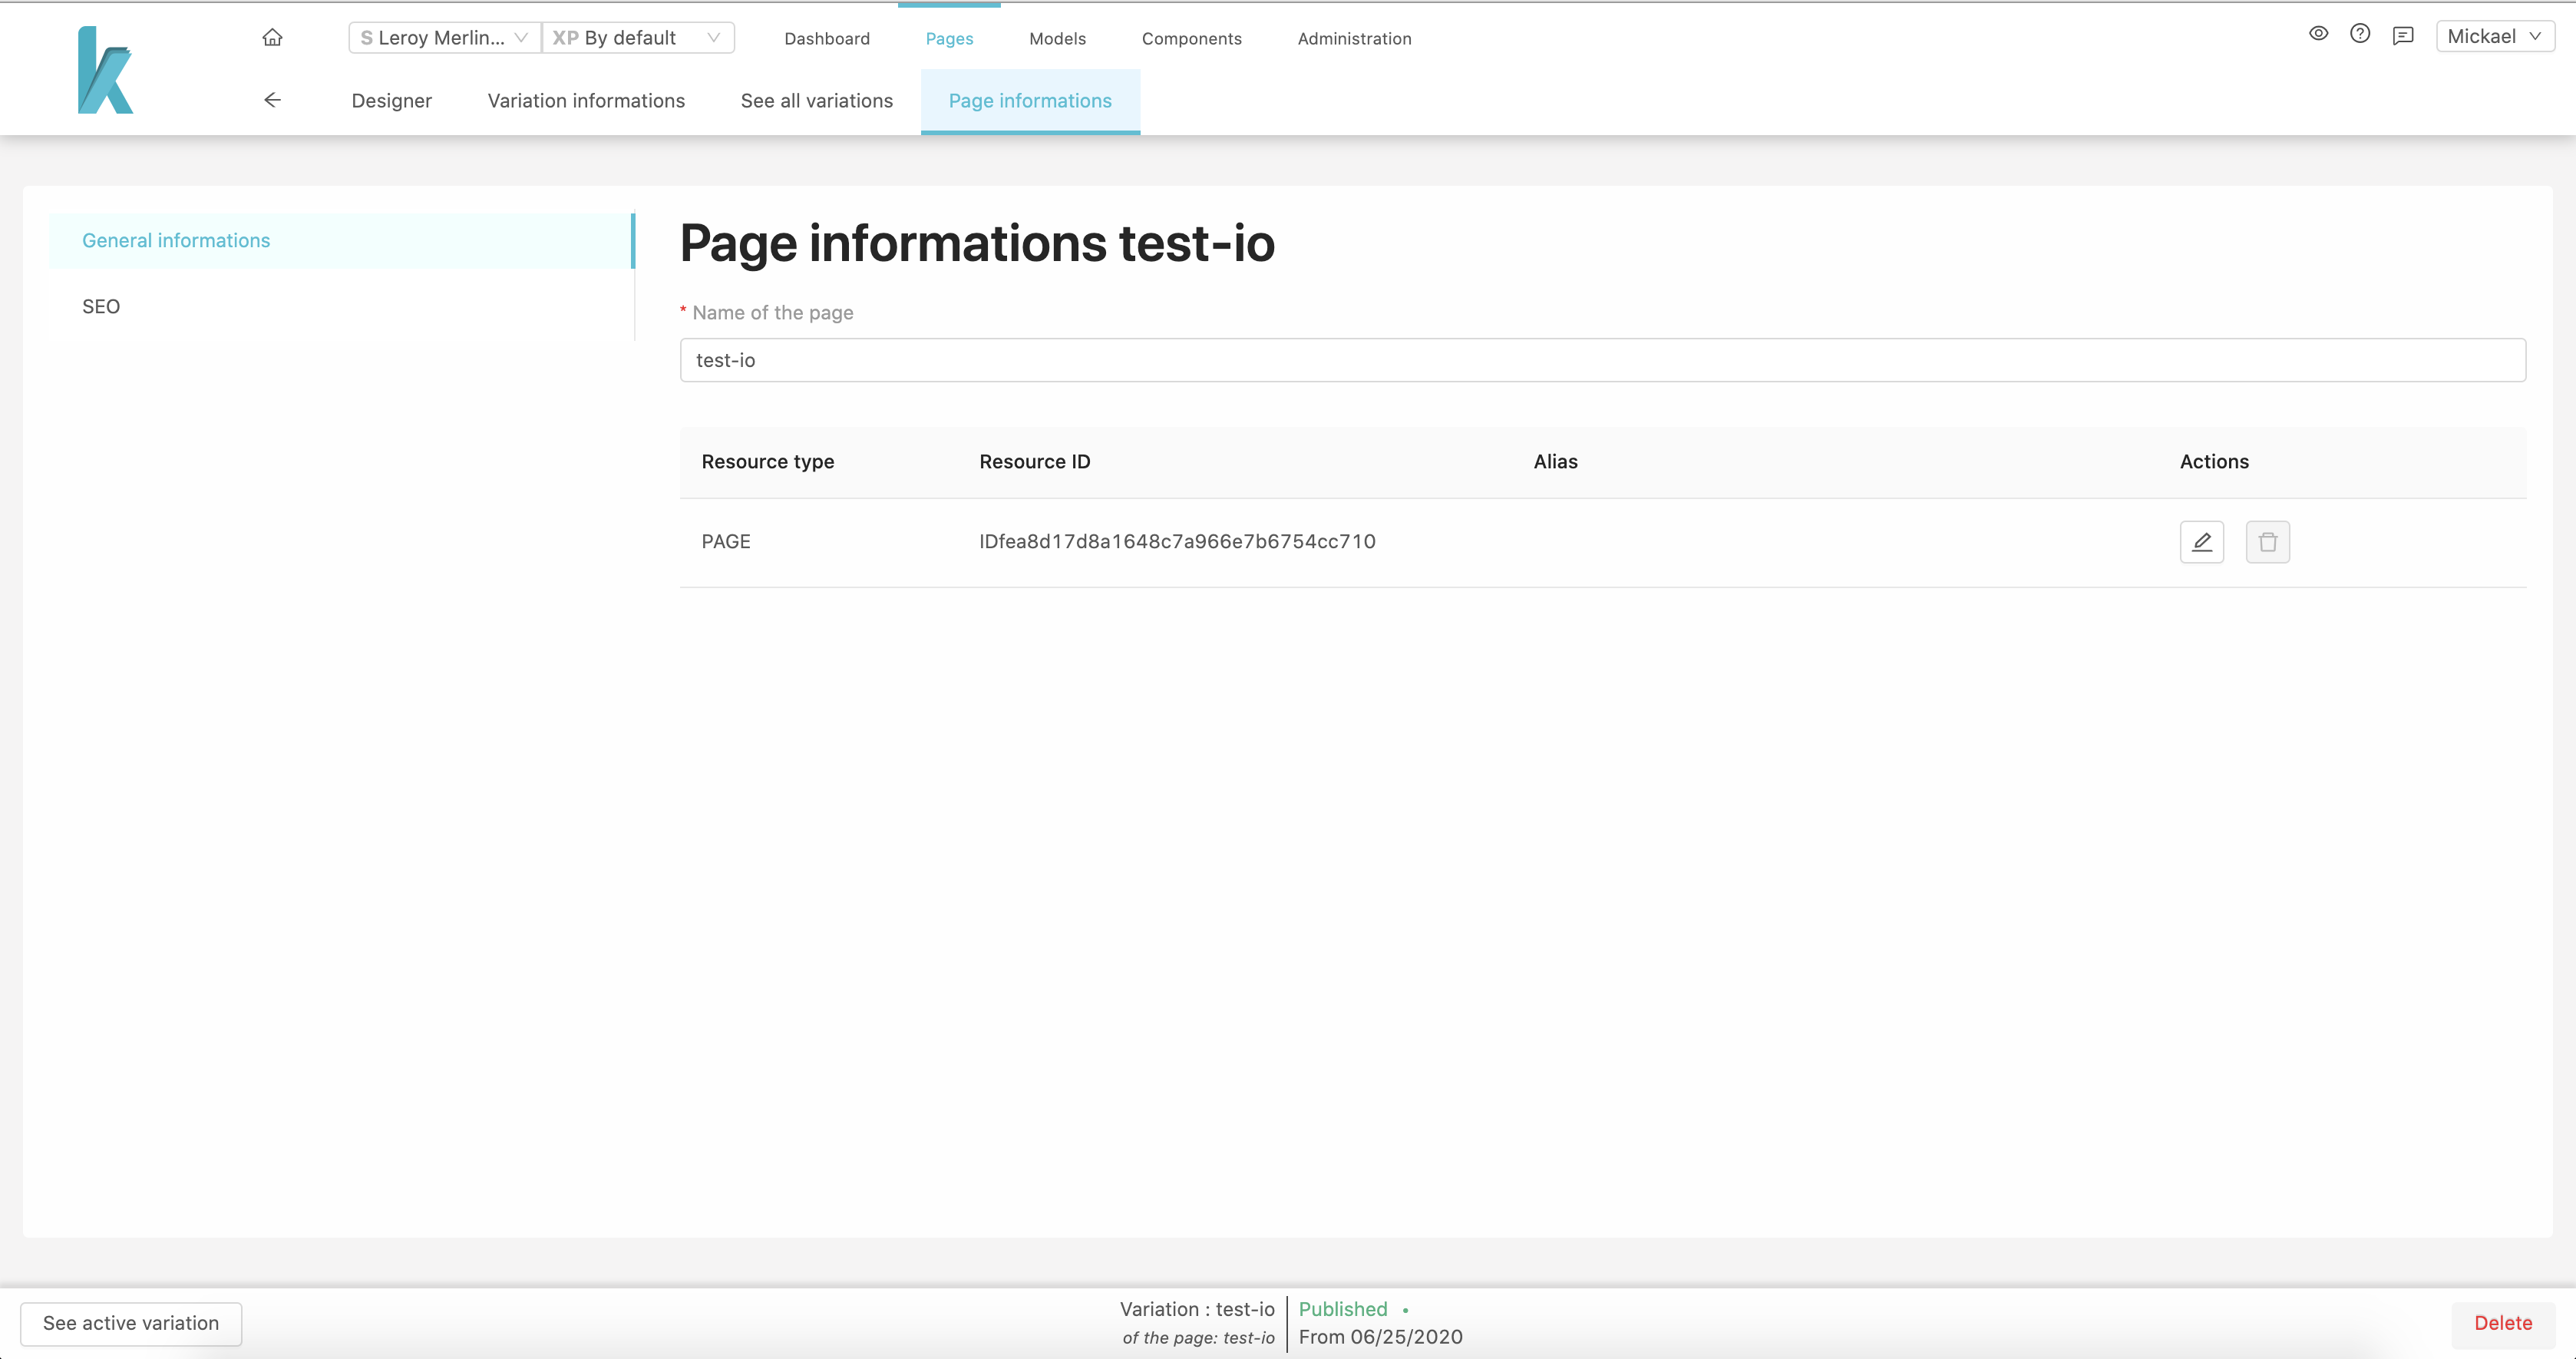
From there you can :
- See / edit your page’s name
- See / edit its resource type and id
- Set an Alias
- Delete the page
SEO
Click on the SEO sub-tab :
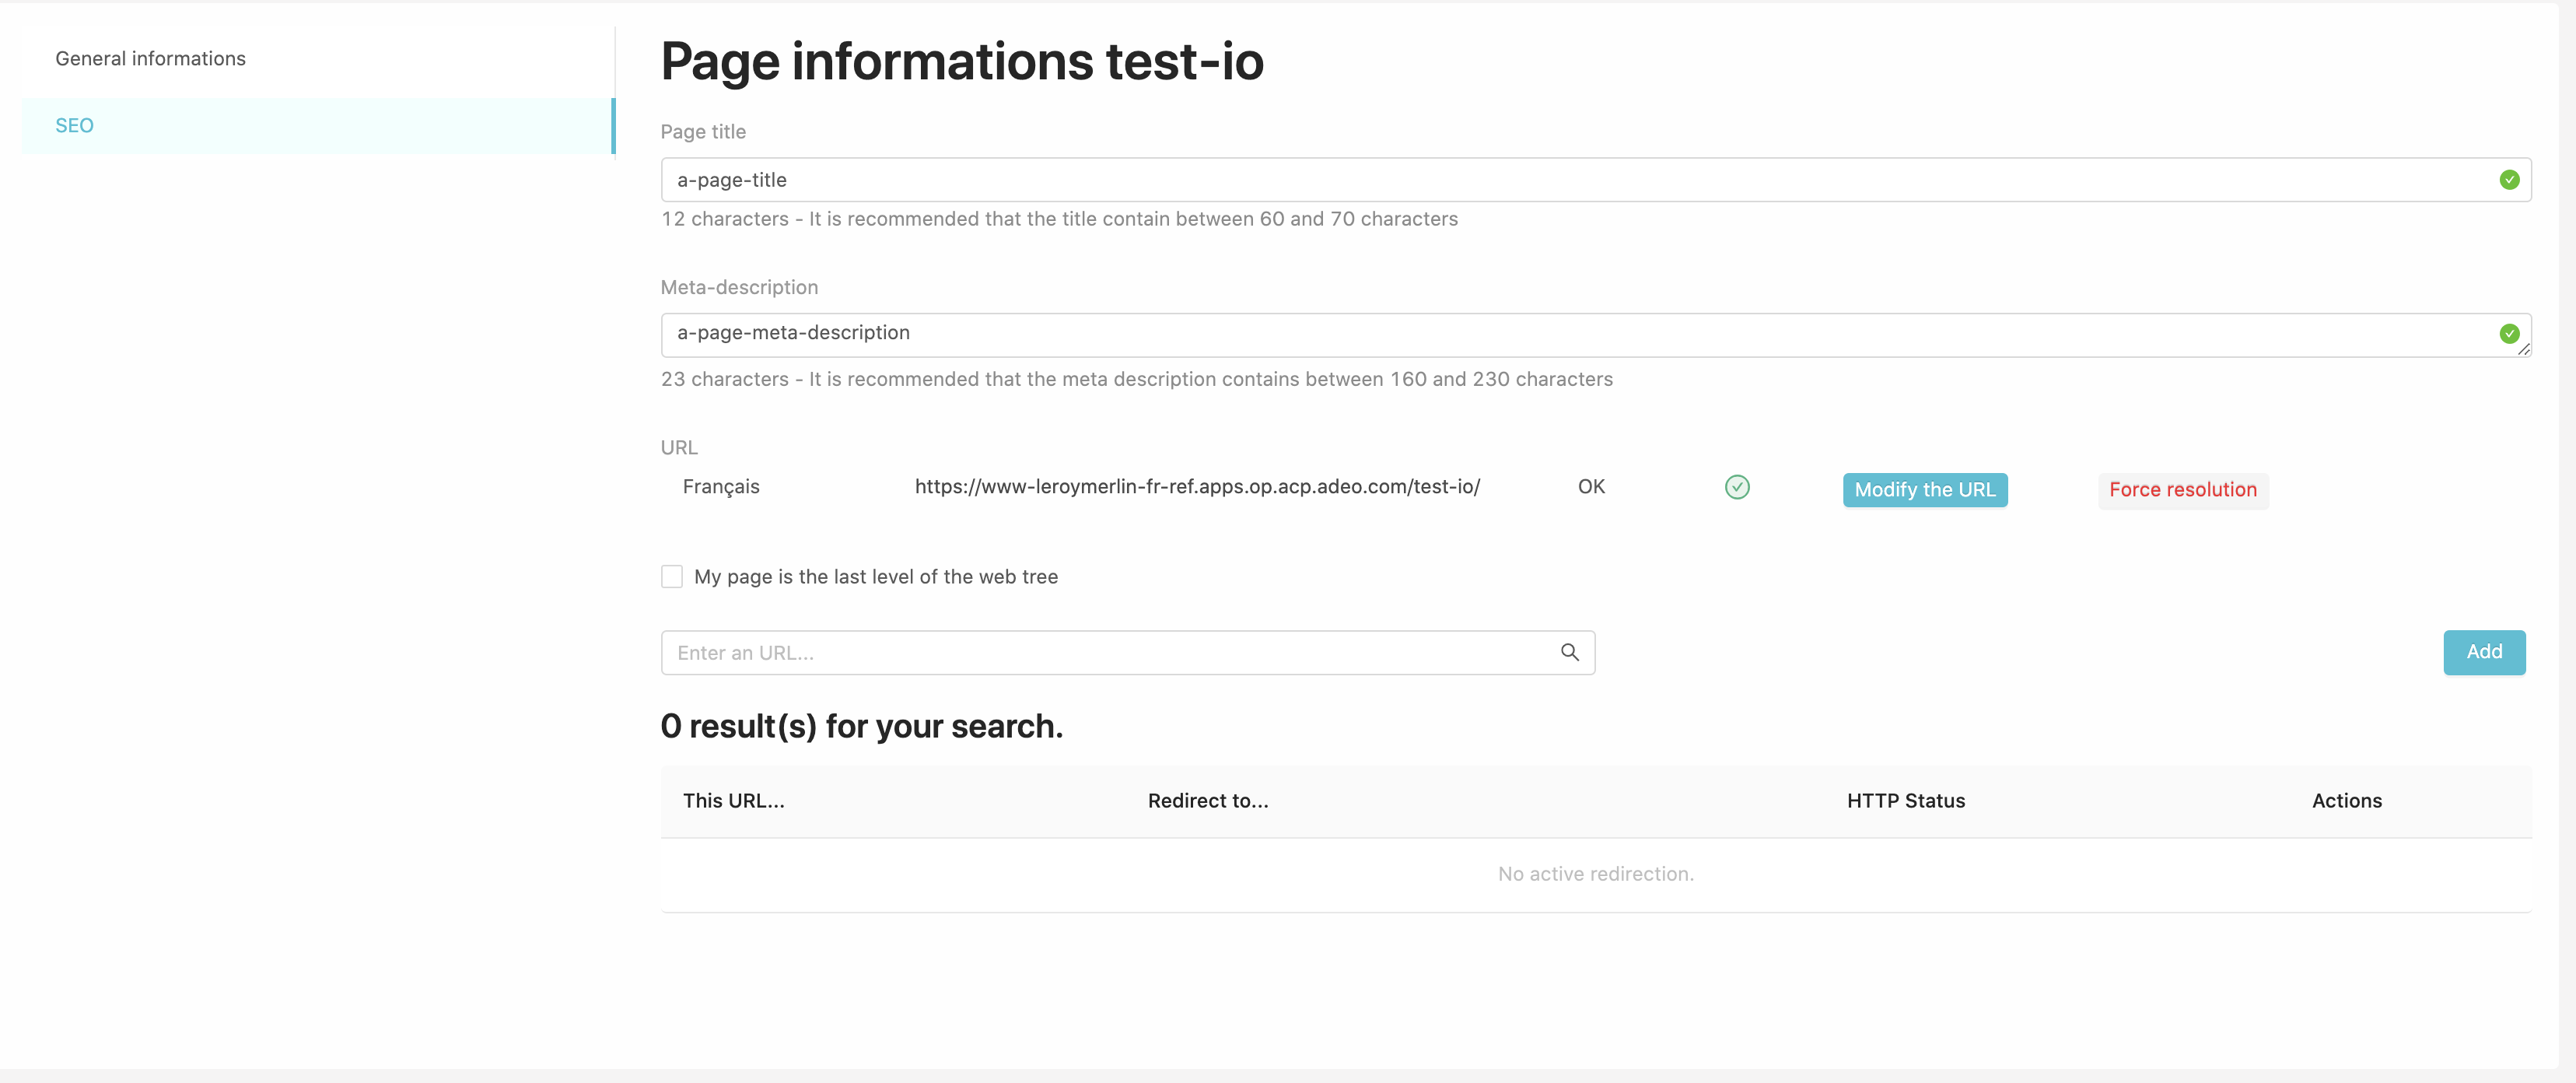
On this screen you can :
- see / edit your page’s title
- see / edit your page’s meta-description
- see / edit / trigger a new resolution (for remote resolver) your page’s URL
- set the page as
last level of the web tree(add the .html) - Add redirections to your page
Adding a redirection
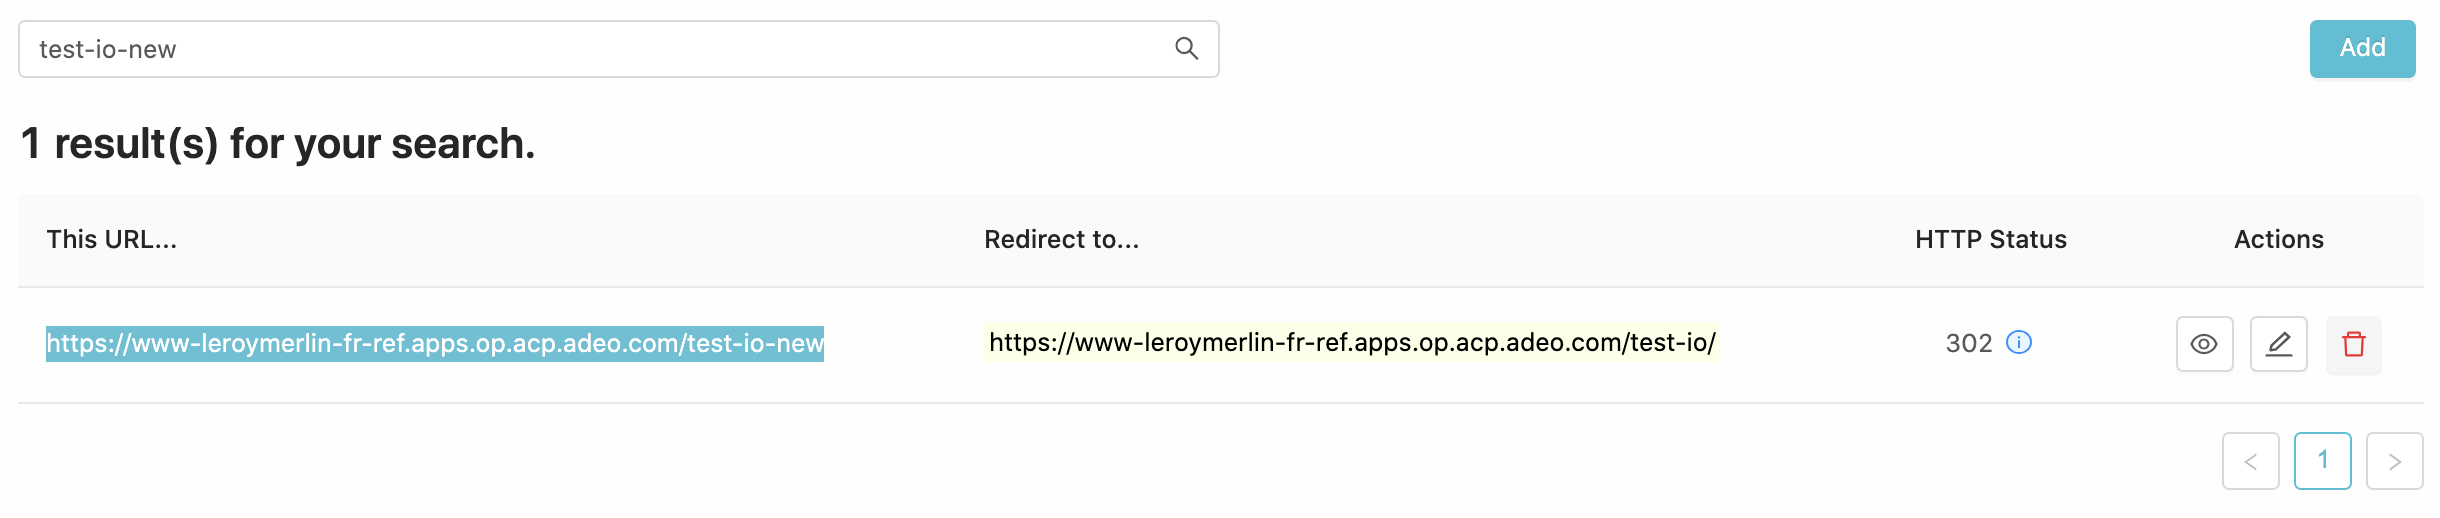
To create a new redirection to this page, use the search input to look for an available URL, if there are no results, you can click Add on the right :
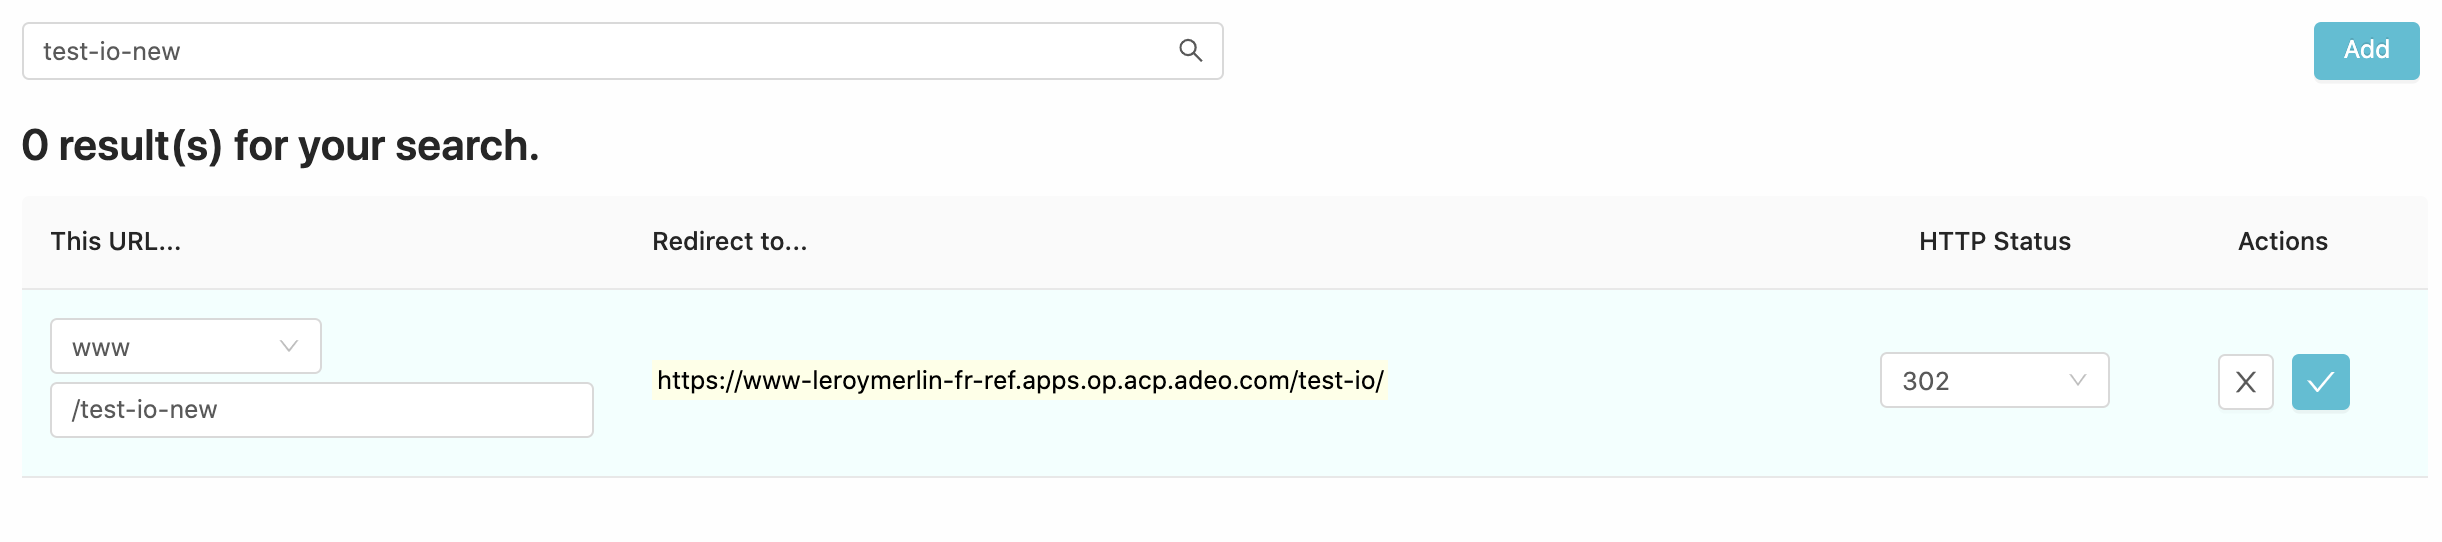
- Set the tenant
- Enter the searched URL relative path
- Set the redirection status (301/302)
- Click
Save
Your new URL should appear on the redirection list, you can now access it or edit / delete it.